Expiration dates are a great tool for creating more effective offers. Not only do they ensure that your offers are automatically removed when they're no longer valid, but they also create a sense of urgency—encouraging website visitors to contact you now rather than wait.
Follow the instructions below to add an expiration date to any offer or sweepstakes.
Did you know? In addition to an expiration date, you can also set an urgency date! An expiration date will remove the offer from your website, while an urgency date will not.
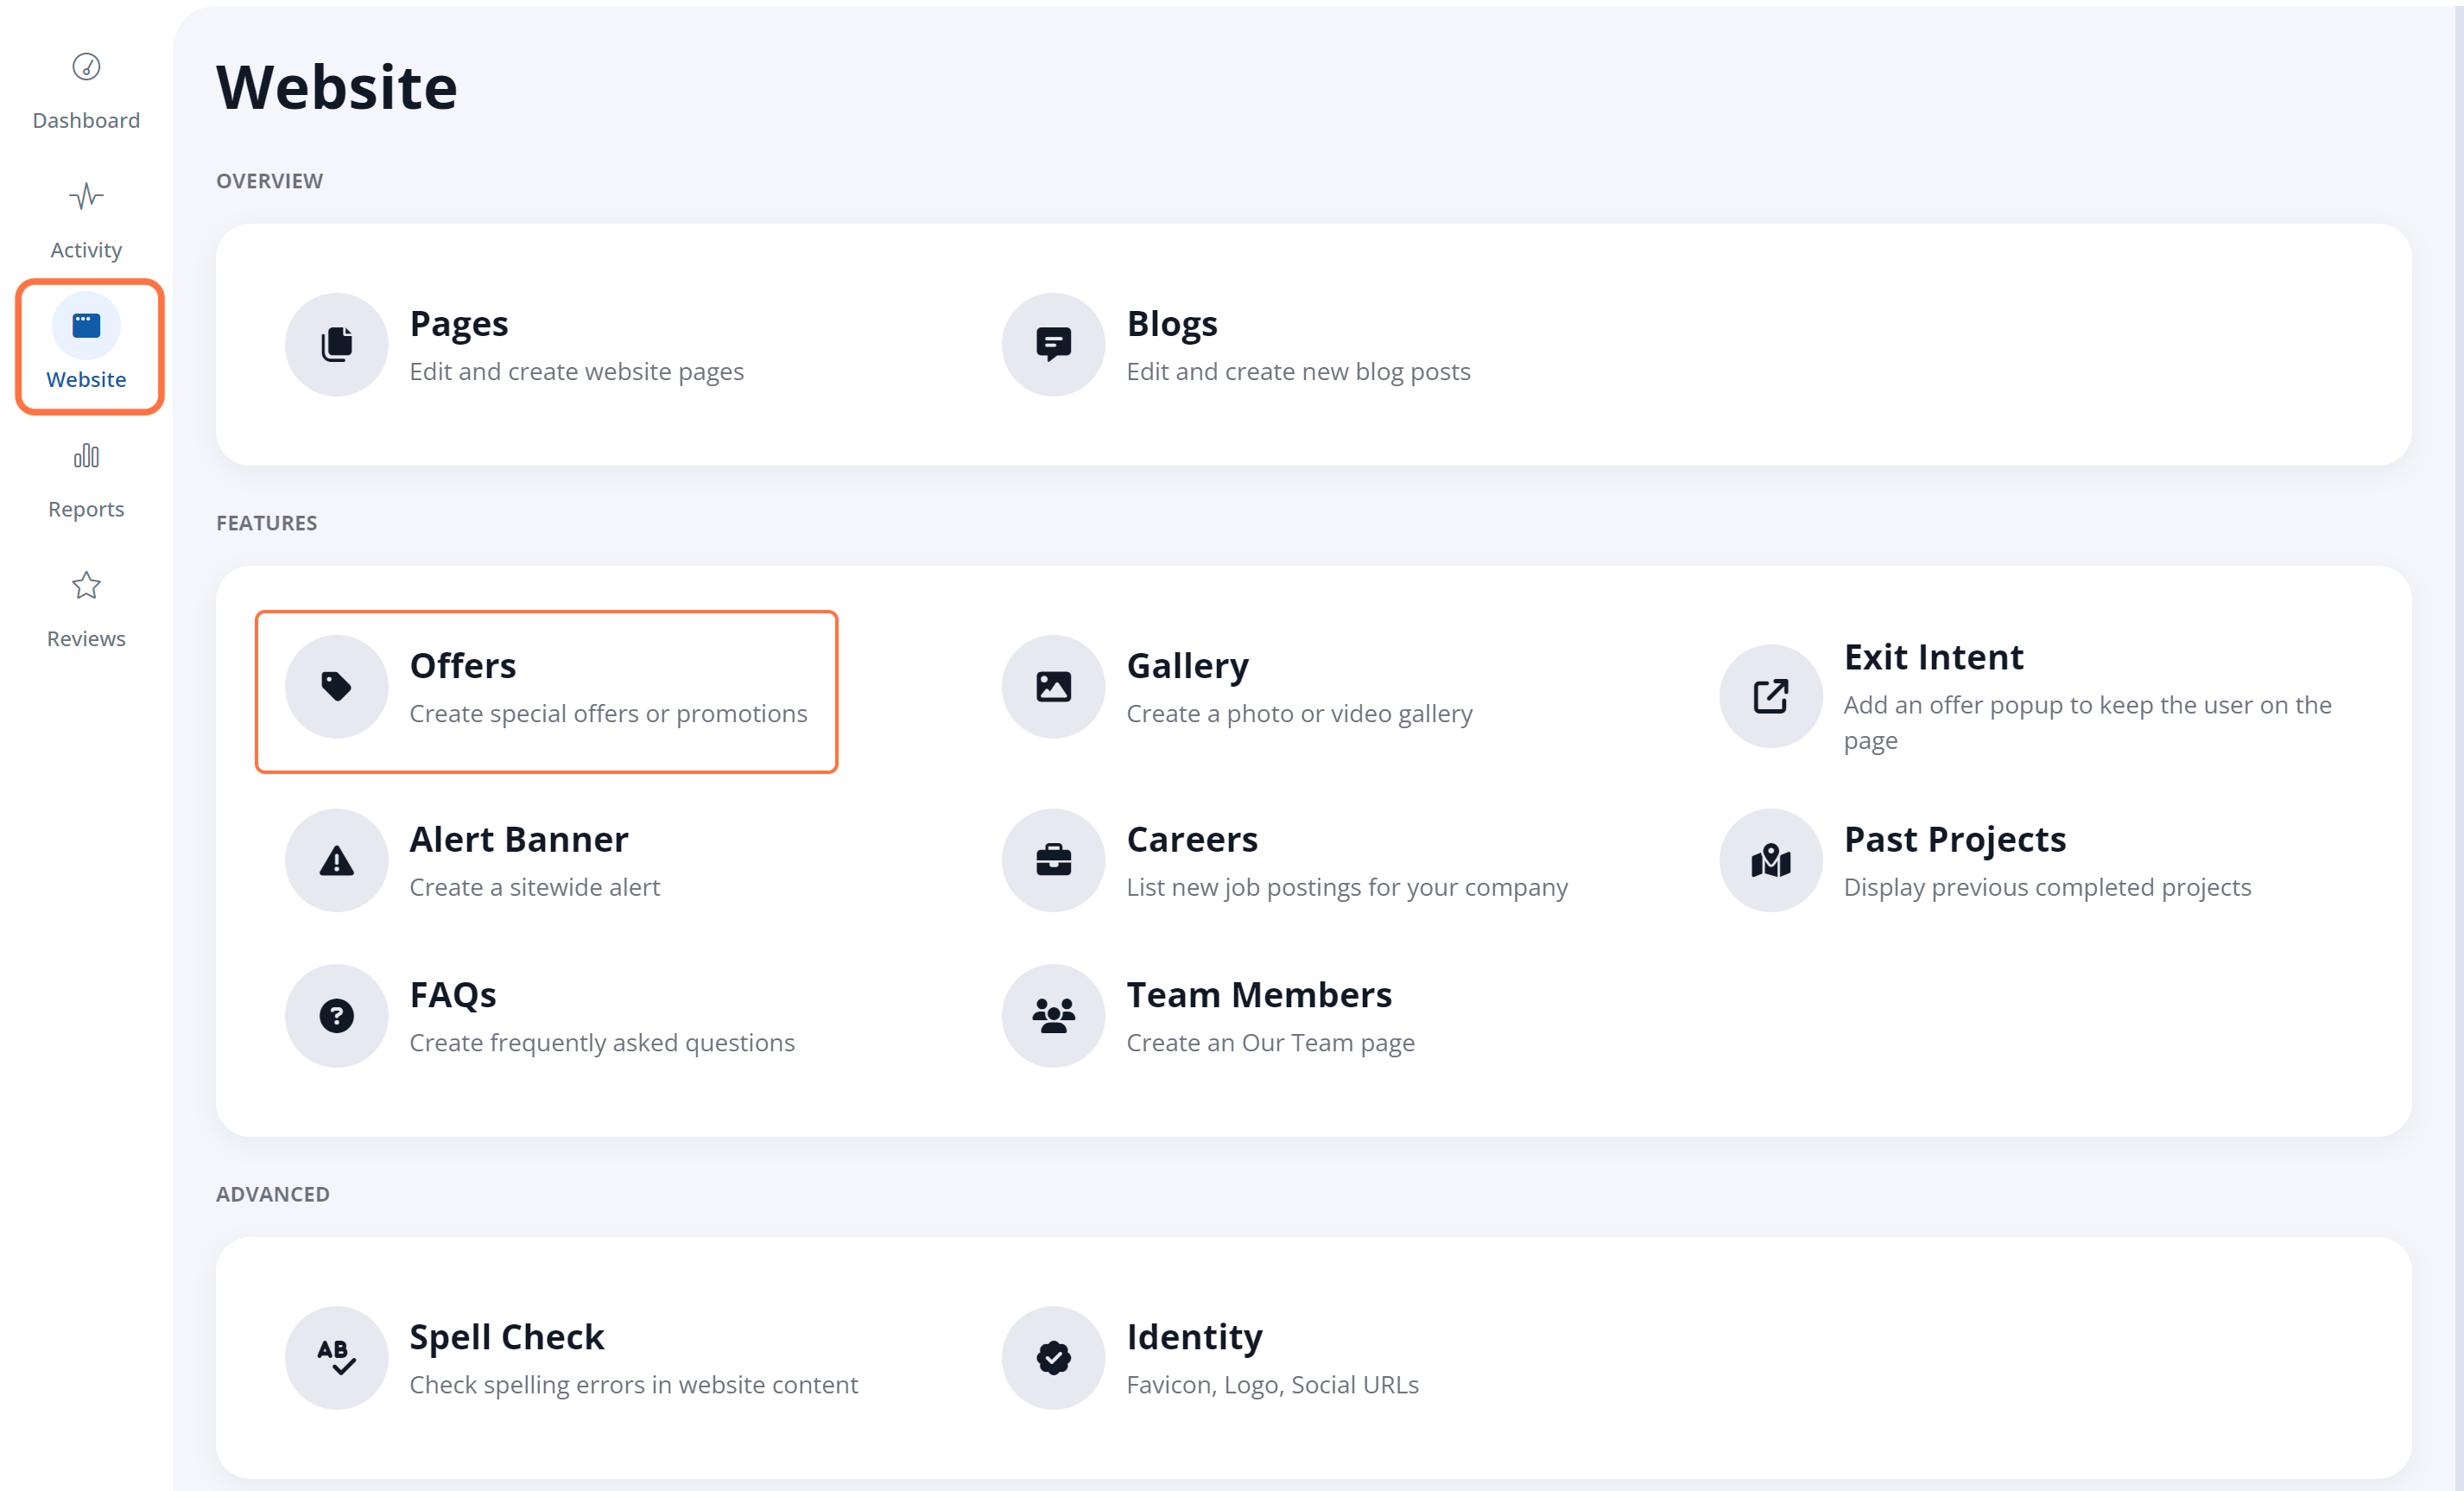
1. Go to Your Offers Dashboard
After logging into your LISA platform, navigate to Website > Offers.
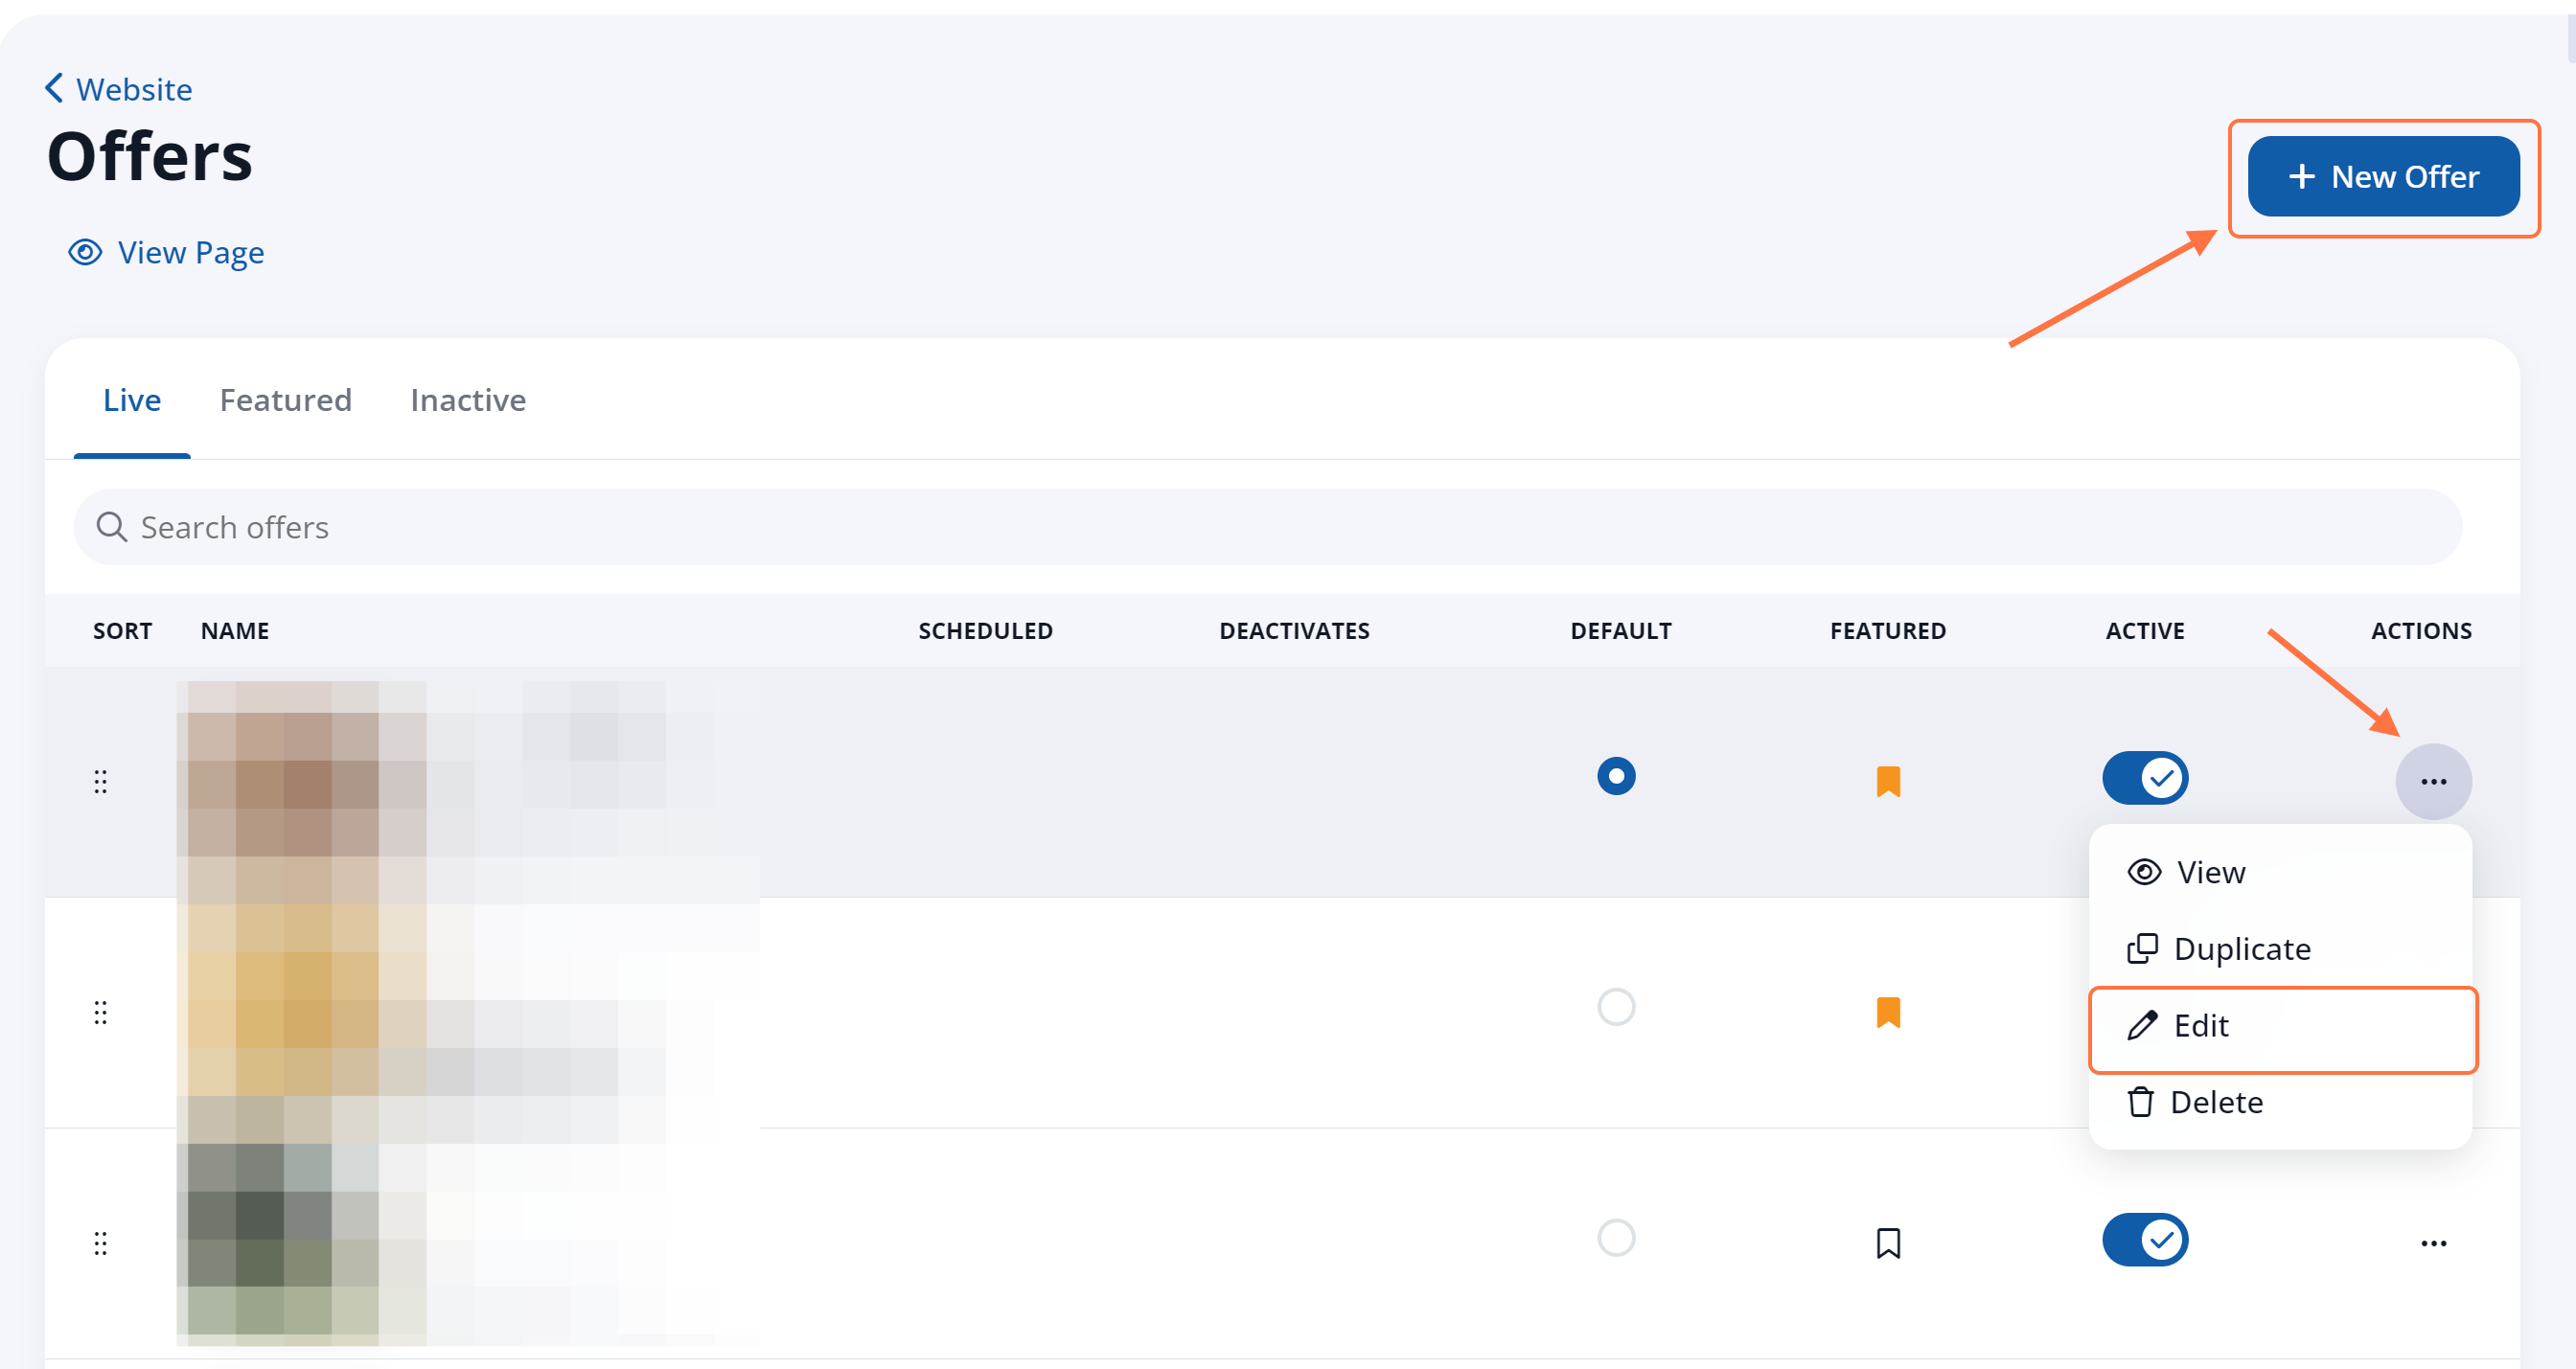
2. Click the Offer (or Create a New One)
From your Offers dashboard, click the offer for which you'd like to set an expiration date.
If you'd like to add an expiration date to a brand-new offer, click + New Offer and refer to our instructions on creating a new offer if you need help.
3. Select Your Expiration Date
At the bottom of the Offer Card tab, you'll see a section for Scheduling. In the Schedule Offer Deactivation field, add a date into in the mm/dd/yyyy format, or click the calendar to use the date picker functionality instead.
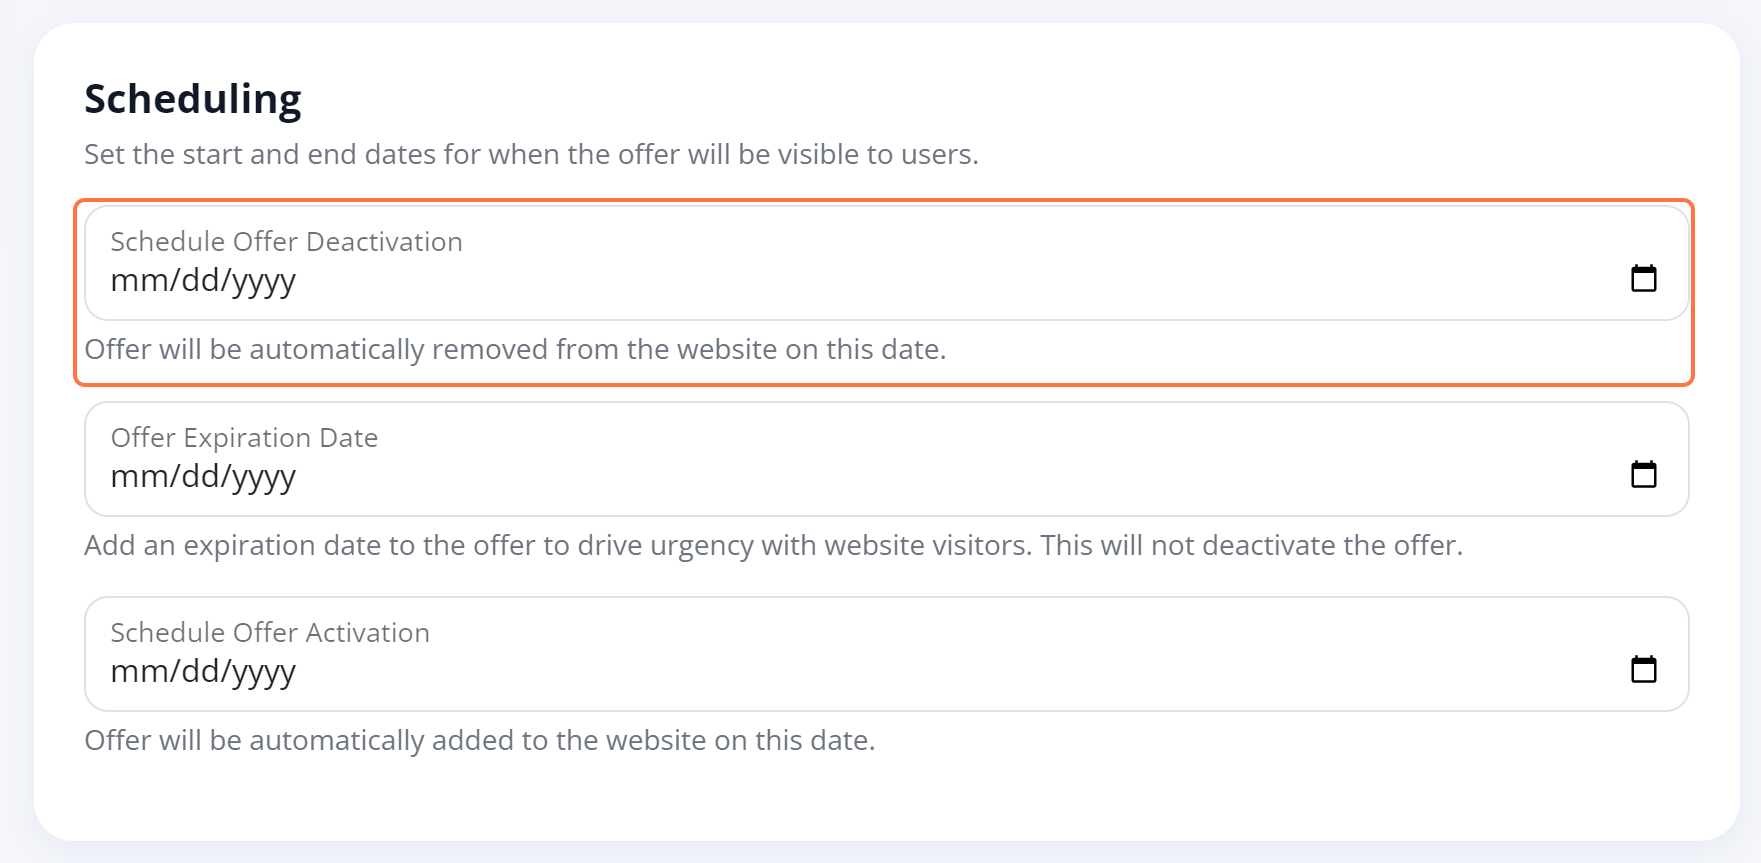
Expiration dates are visible to website visitors. See where they display on an offer or sweepstakes here.
4. Save Your Changes
Once you've added your expiration date, scroll to the top and save your changes.

What's next? Find out what happens when an offer expires, or learn how to extend an offer past its expiration date.