Media galleries allow you to create custom groups of photos and videos to display throughout your website. You can create as many galleries as you'd like, grouped according to whatever works best for your business: product type, service locations, brands, and more.
To create a new media gallery, follow the instructions below.
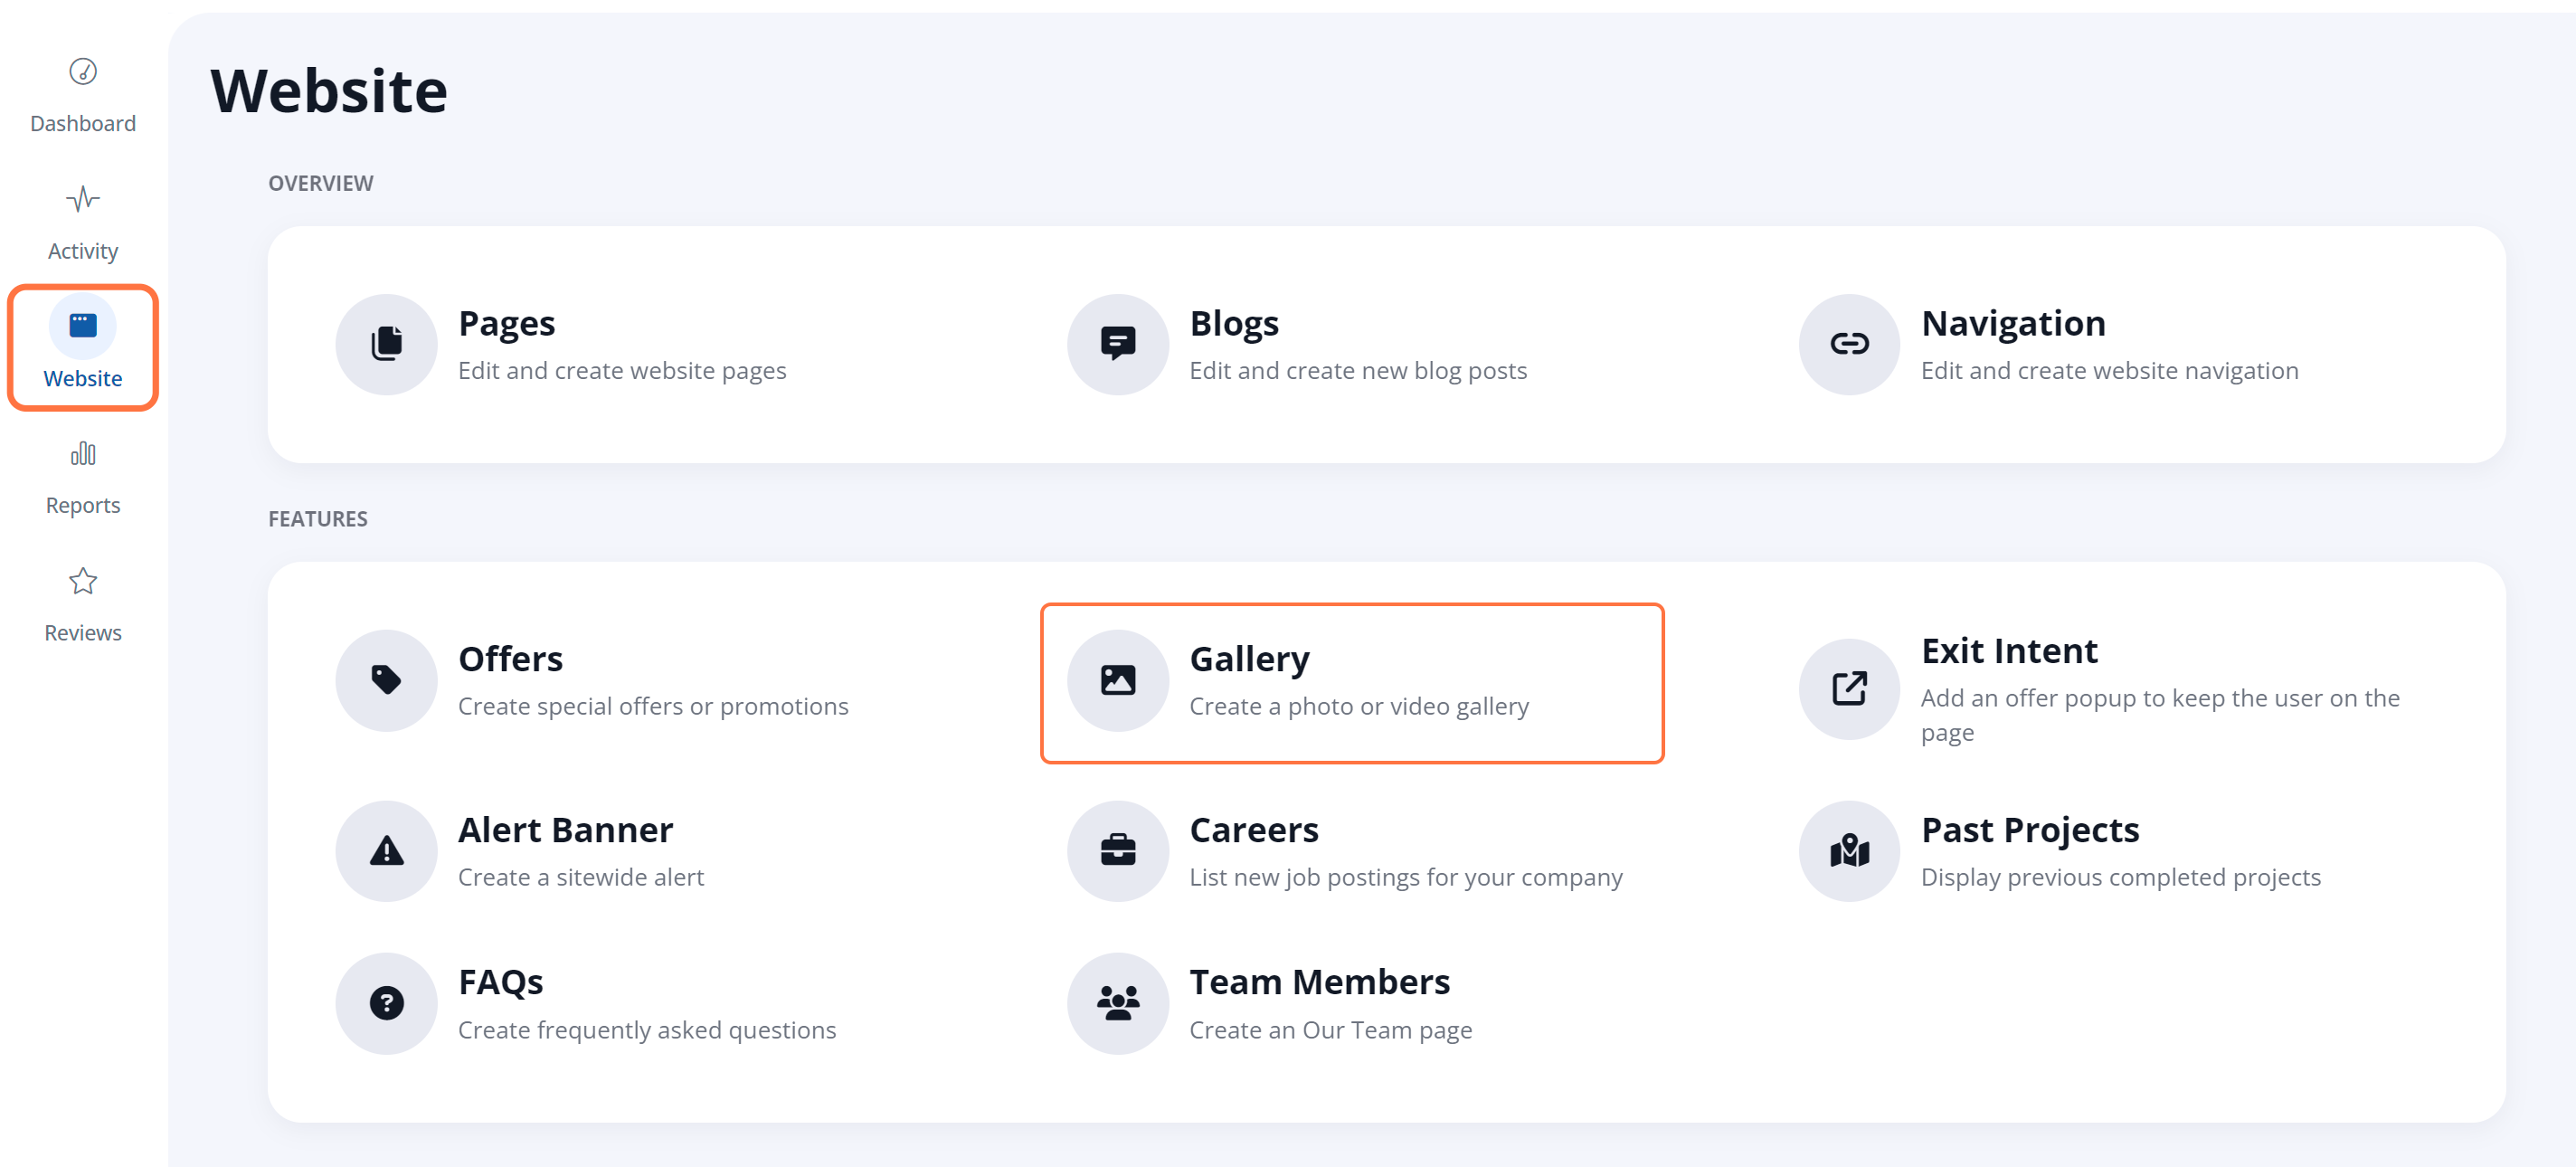
1. Go to Media Galleries
After logging into your admin, go to Website > Gallery.
2. Add Gallery
Click the button for New Gallery.

3. Add Gallery Details
On the New Gallery page, fill out the details and upload your media as shown below.
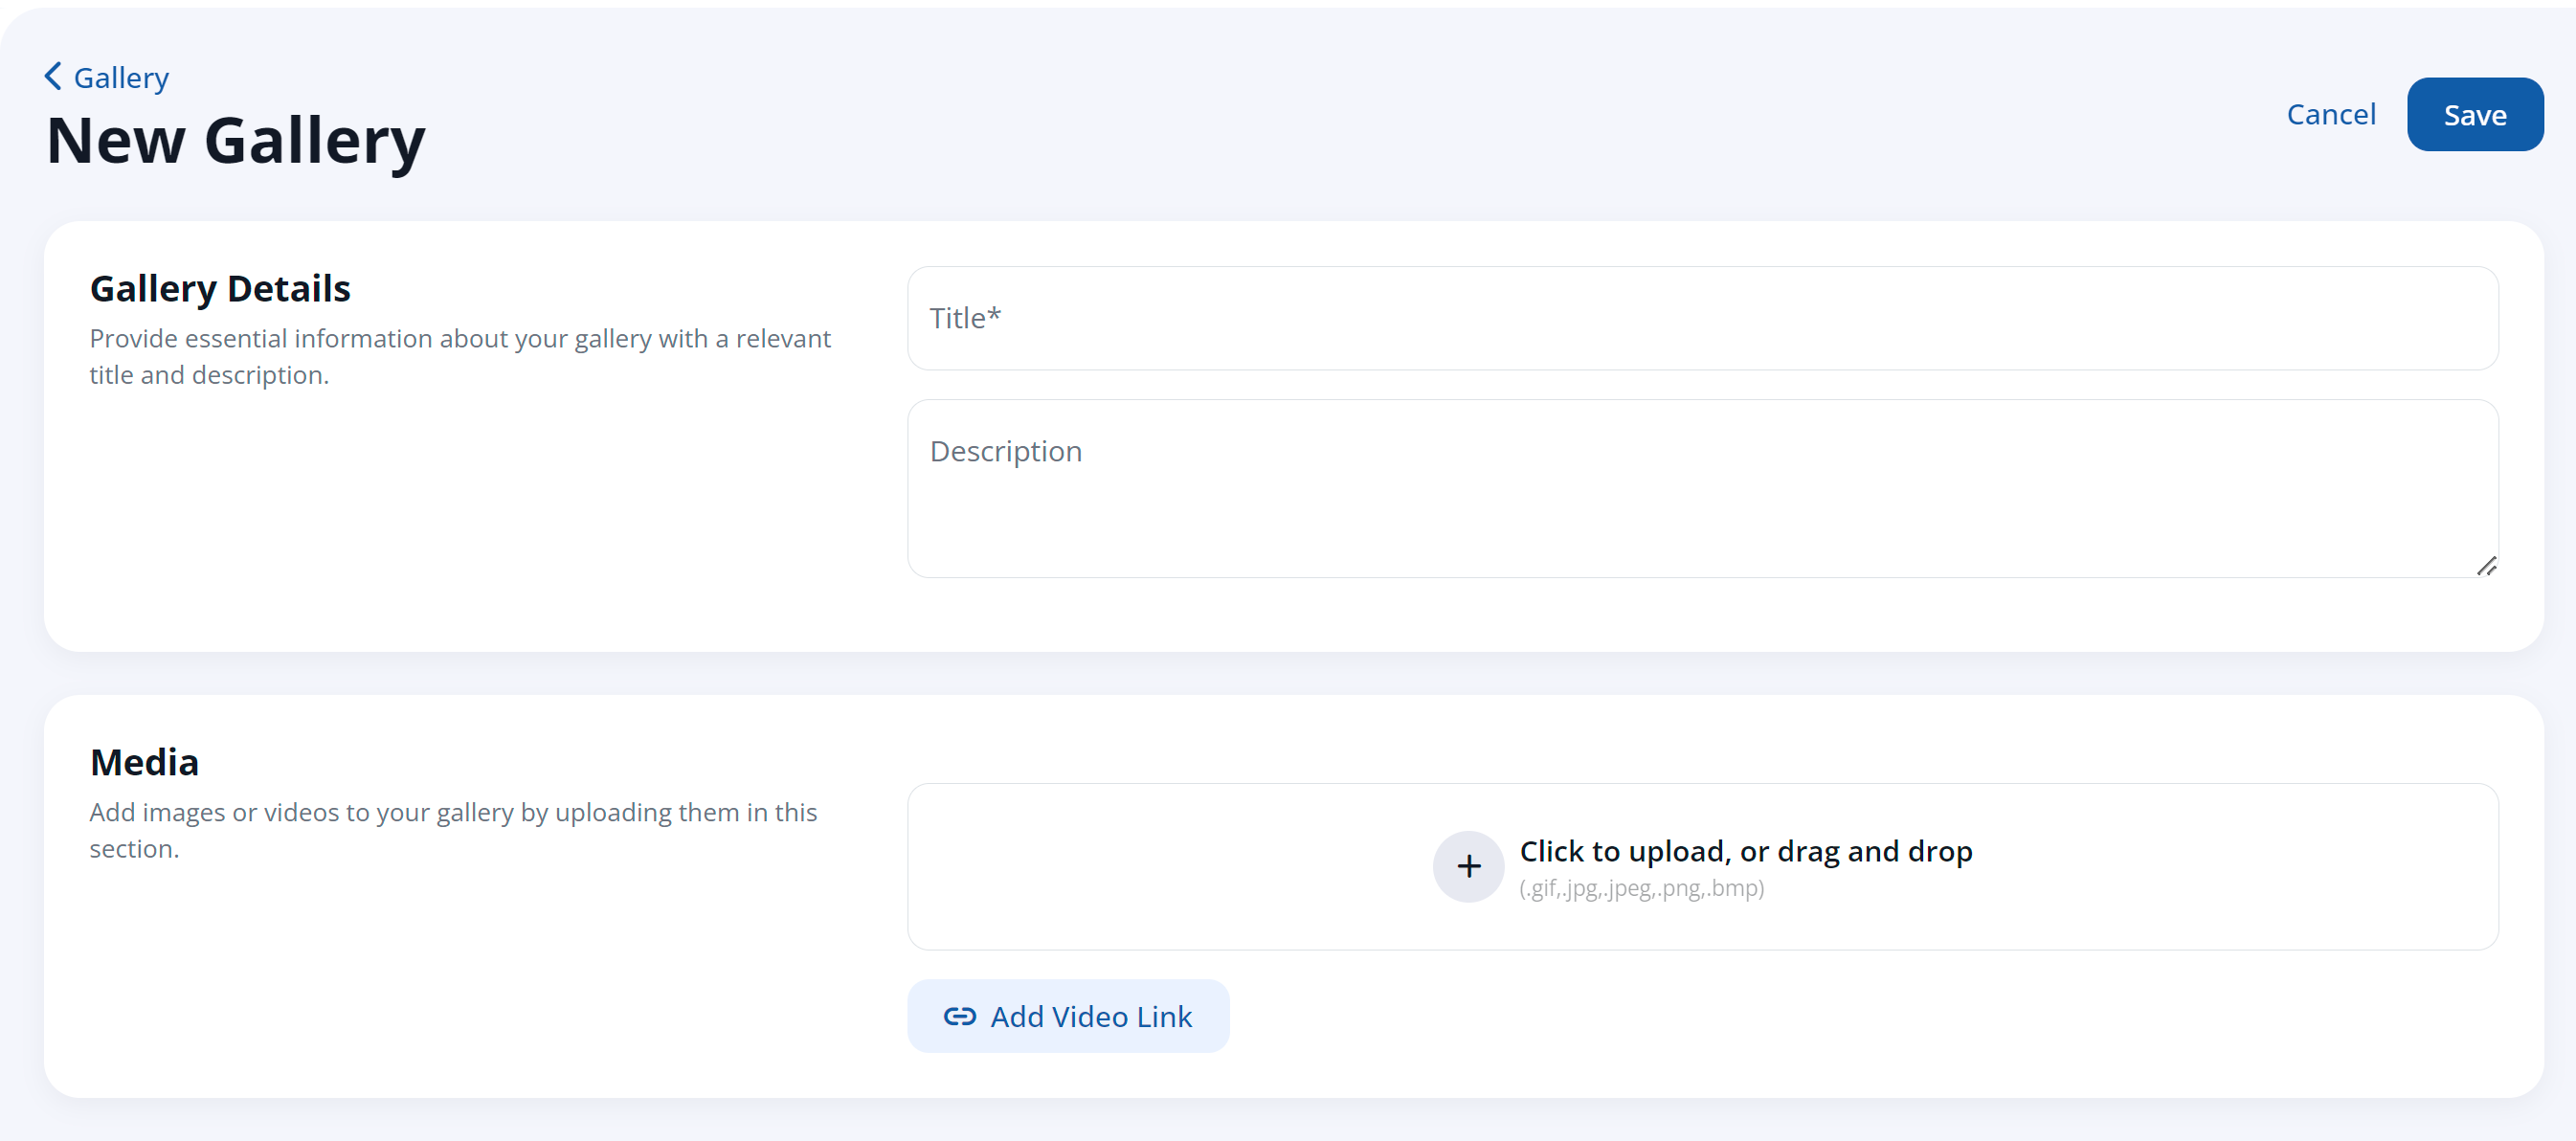
Here's more information about each field on this page:
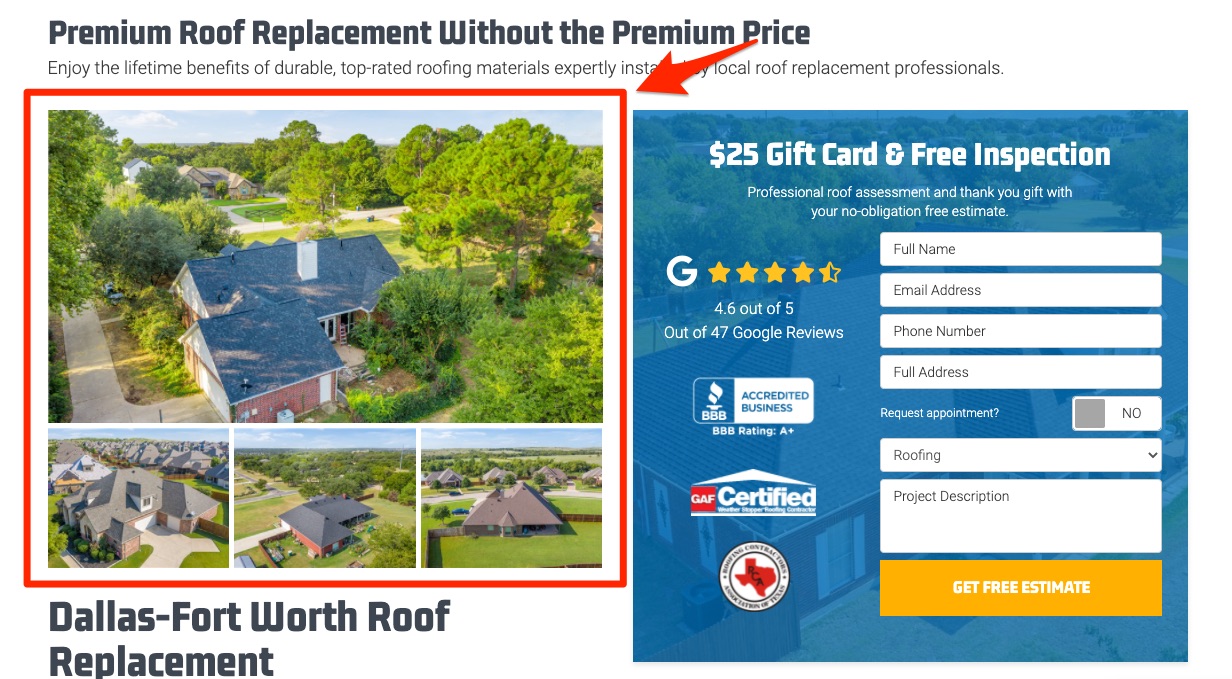
- Title: The title appears from your Gallery dashboard as well as the sidebar when a website visitor clicks to enlarge a picture (shown below).
- Description: The gallery description may appear when images are clicked or when the gallery is displayed.
- Images: Click to upload to add an image or choose the Add Video Link button to insert as many photos or videos as you'd like, paying special attention to the helpful guidelines in the bulleted list. (Note that image files can be directly uploaded, while video files must be a Youtube or Vimeo link.)
4. Optional: Edit Sort Order
Once you've uploaded images, you can edit the sort order. Note that the first image in the gallery will display at the largest size on the page.
To edit the order, click on any image, then drag and drop the image into your preferred order.
5. Save Your Changes
Click Save to save your changes.

Once you've saved your media gallery, you'll be able to make further edits to individual photos (e.g. adding a meta description) if you'd like to.
Once you have created a media gallery, you can assign it to the pages of your website on a page-by-page basis. Get instructions on displaying a gallery by exploring our How To articles.