Media galleries allow you to create groups of photos and videos to display throughout your website. Once you've created a media gallery, you can assign it to display on any page by following the instructions below.
Here's some helpful information to know before you assign a media gallery to a page:
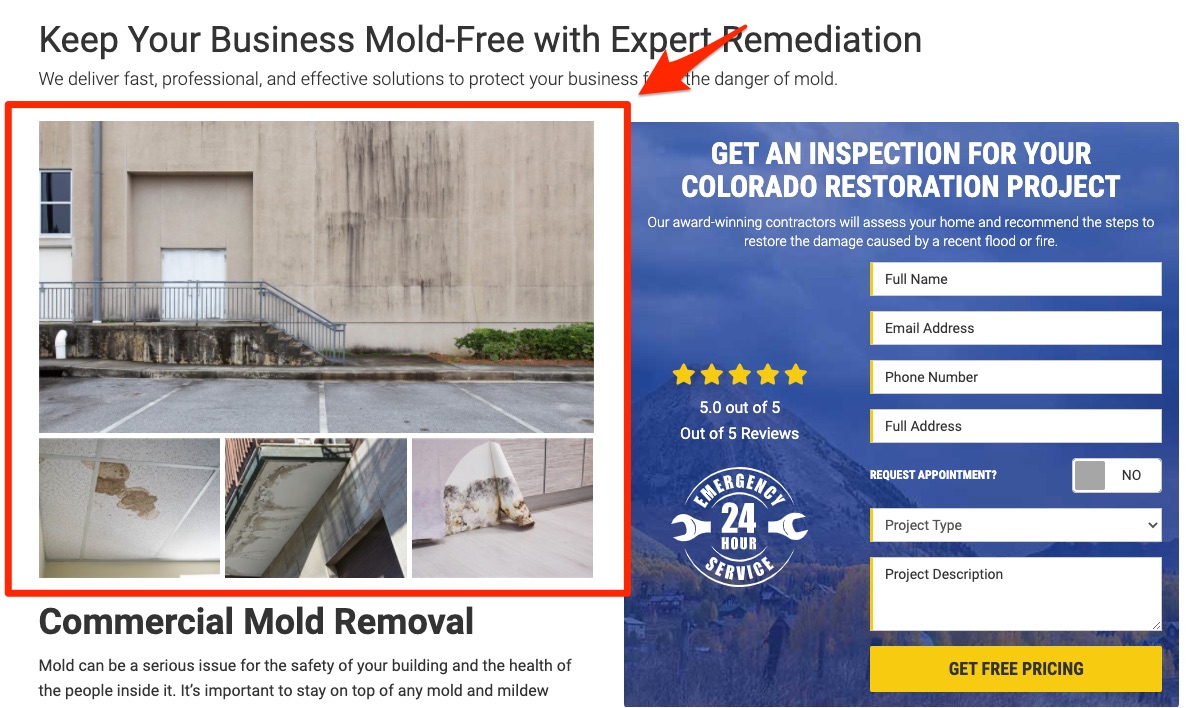
- Where Are Media Galleries Displayed?
- How to Create a Media Gallery
- How to Edit an Image or Video in a Media Gallery (to Add a Title, Alt Text, Etc.)
Please note that in order to view Pages, you must be a LISA admin user with the Content Manager role, in addition to any other user role you have.
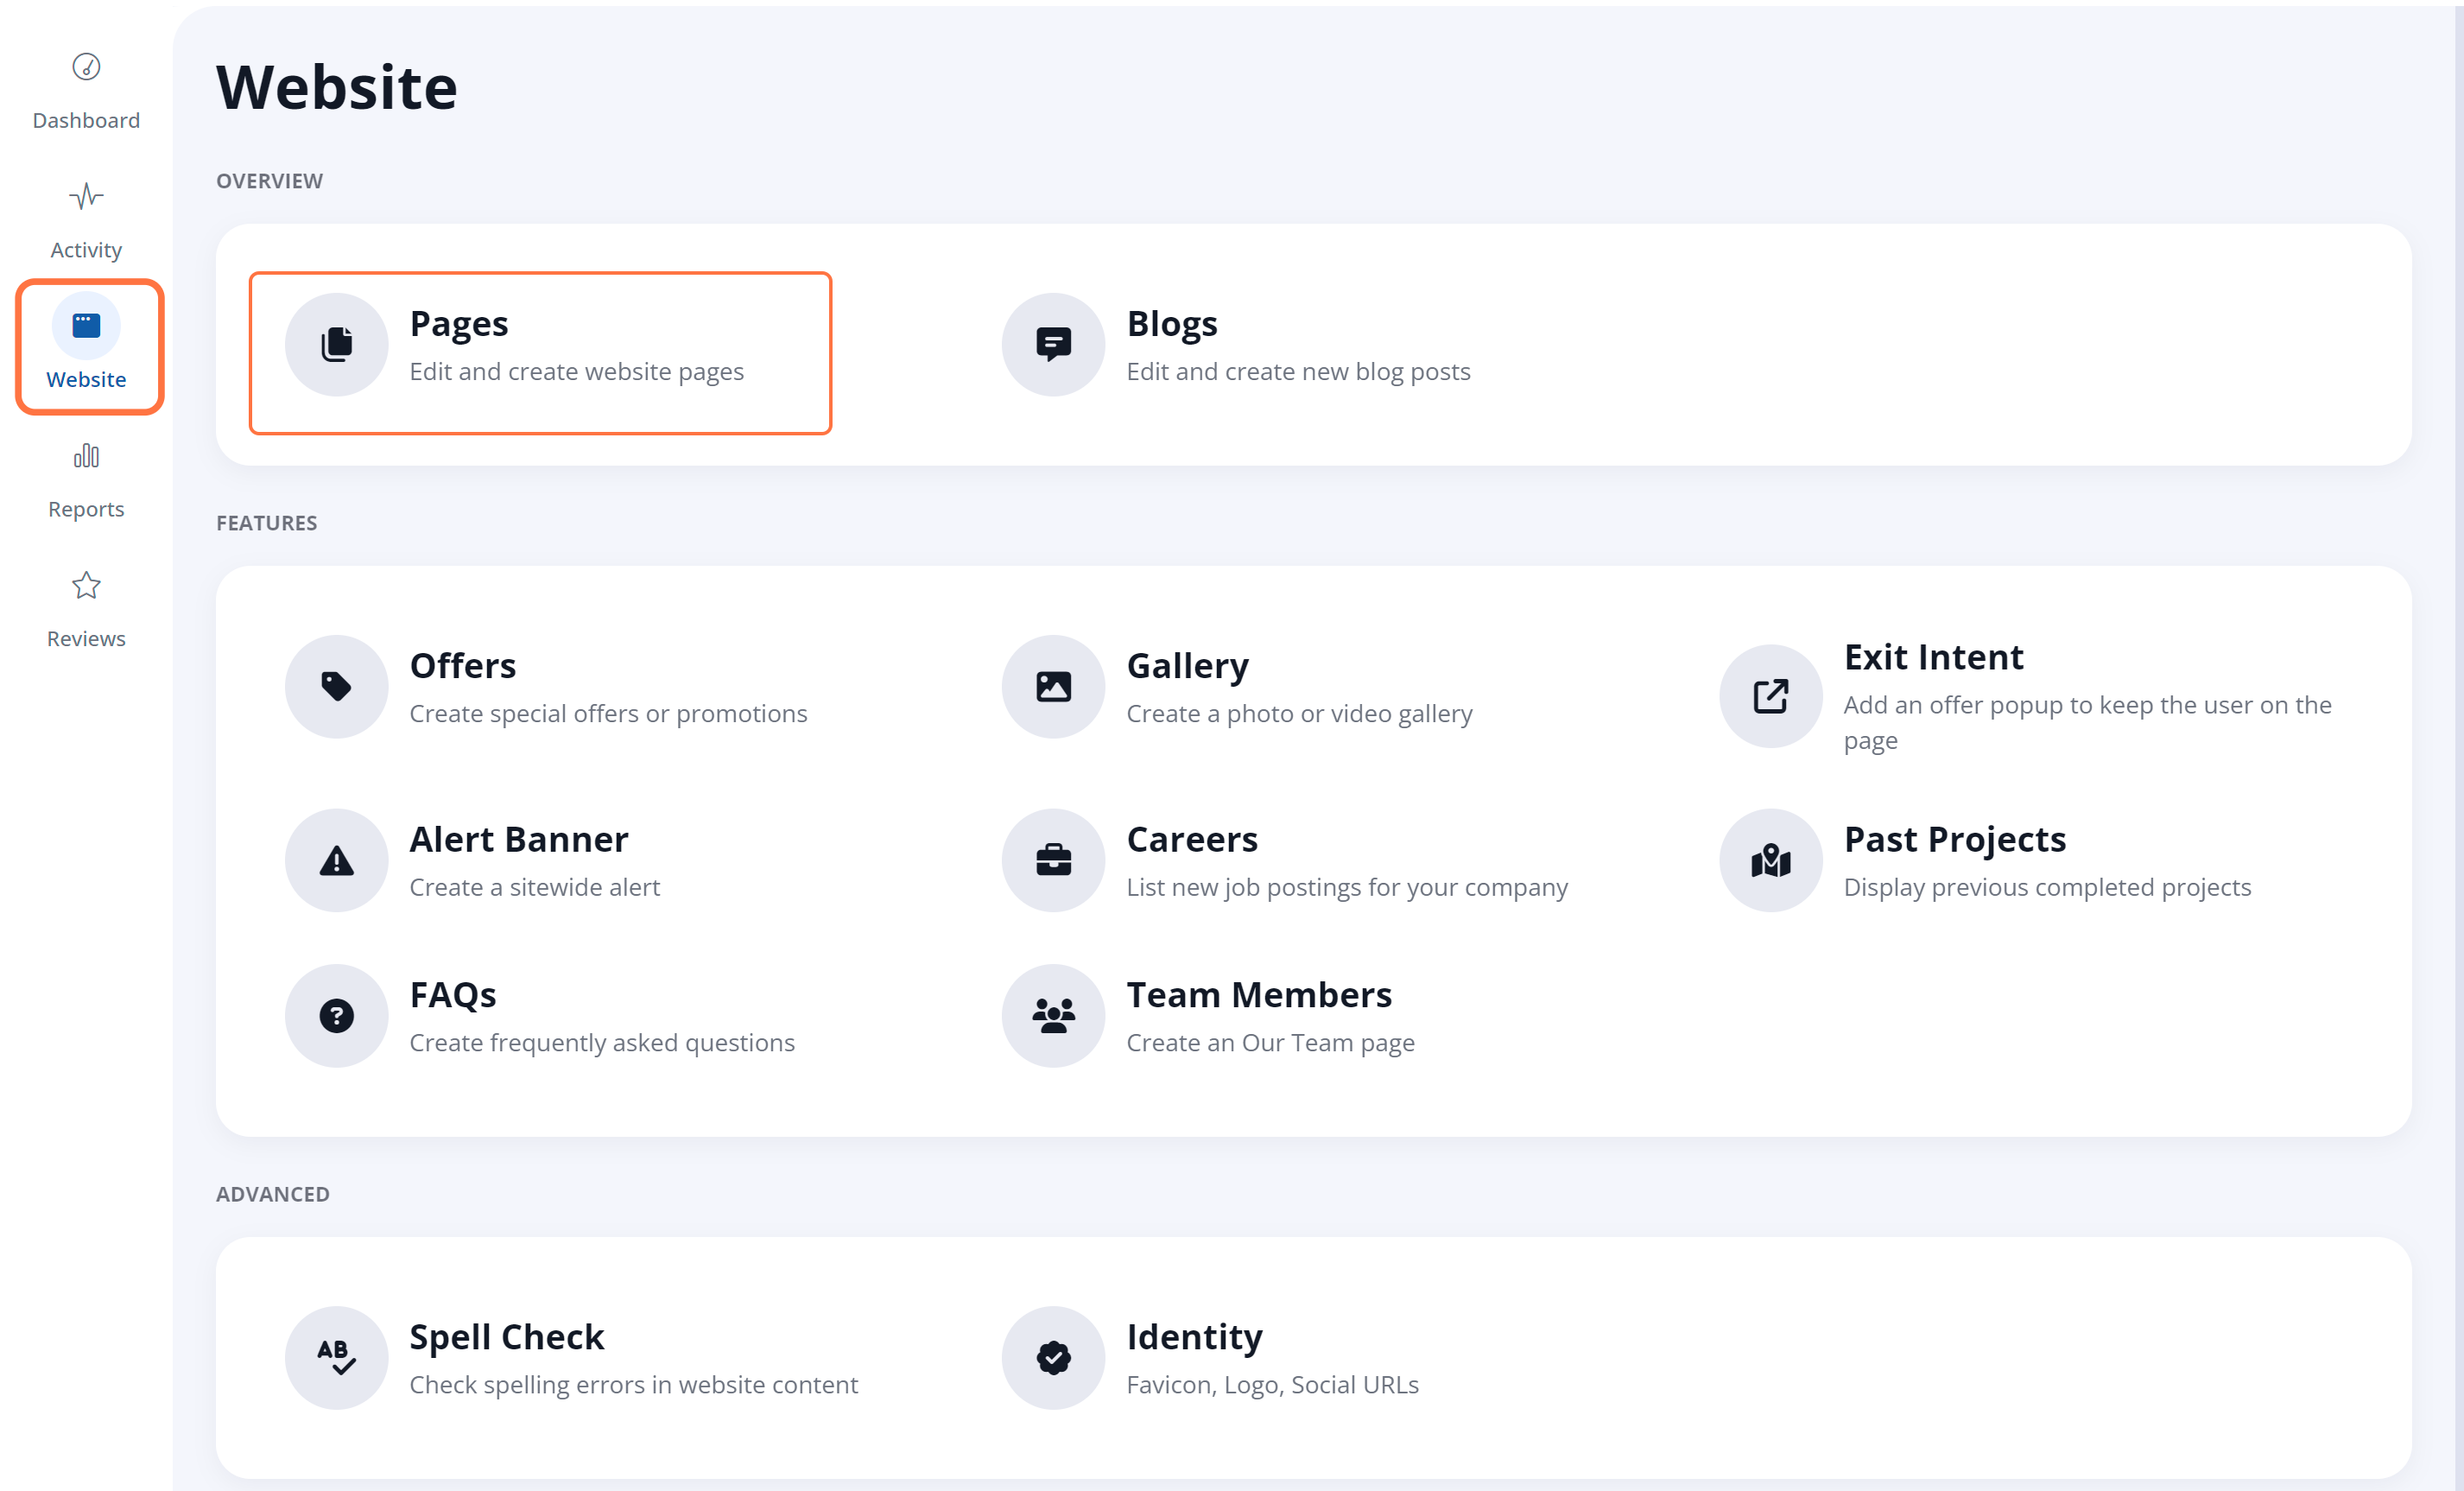
1. Go to Pages
Log into your LISA admin and navigate to Website > Pages.
If you do not see the right page in this list, please contact your Spectrum Client Manager or fill out a support ticket to gain access.
2. Find the Page on Which to Add a Media Gallery
Scroll down or use the search function to find the specific page. Click on the edit icon.

3. Select the Gallery
On the individual page details, navigate to the Page Options tab. In the Interactive Elements section, click on the drop-down menu for Gallery and select your preferred media gallery.
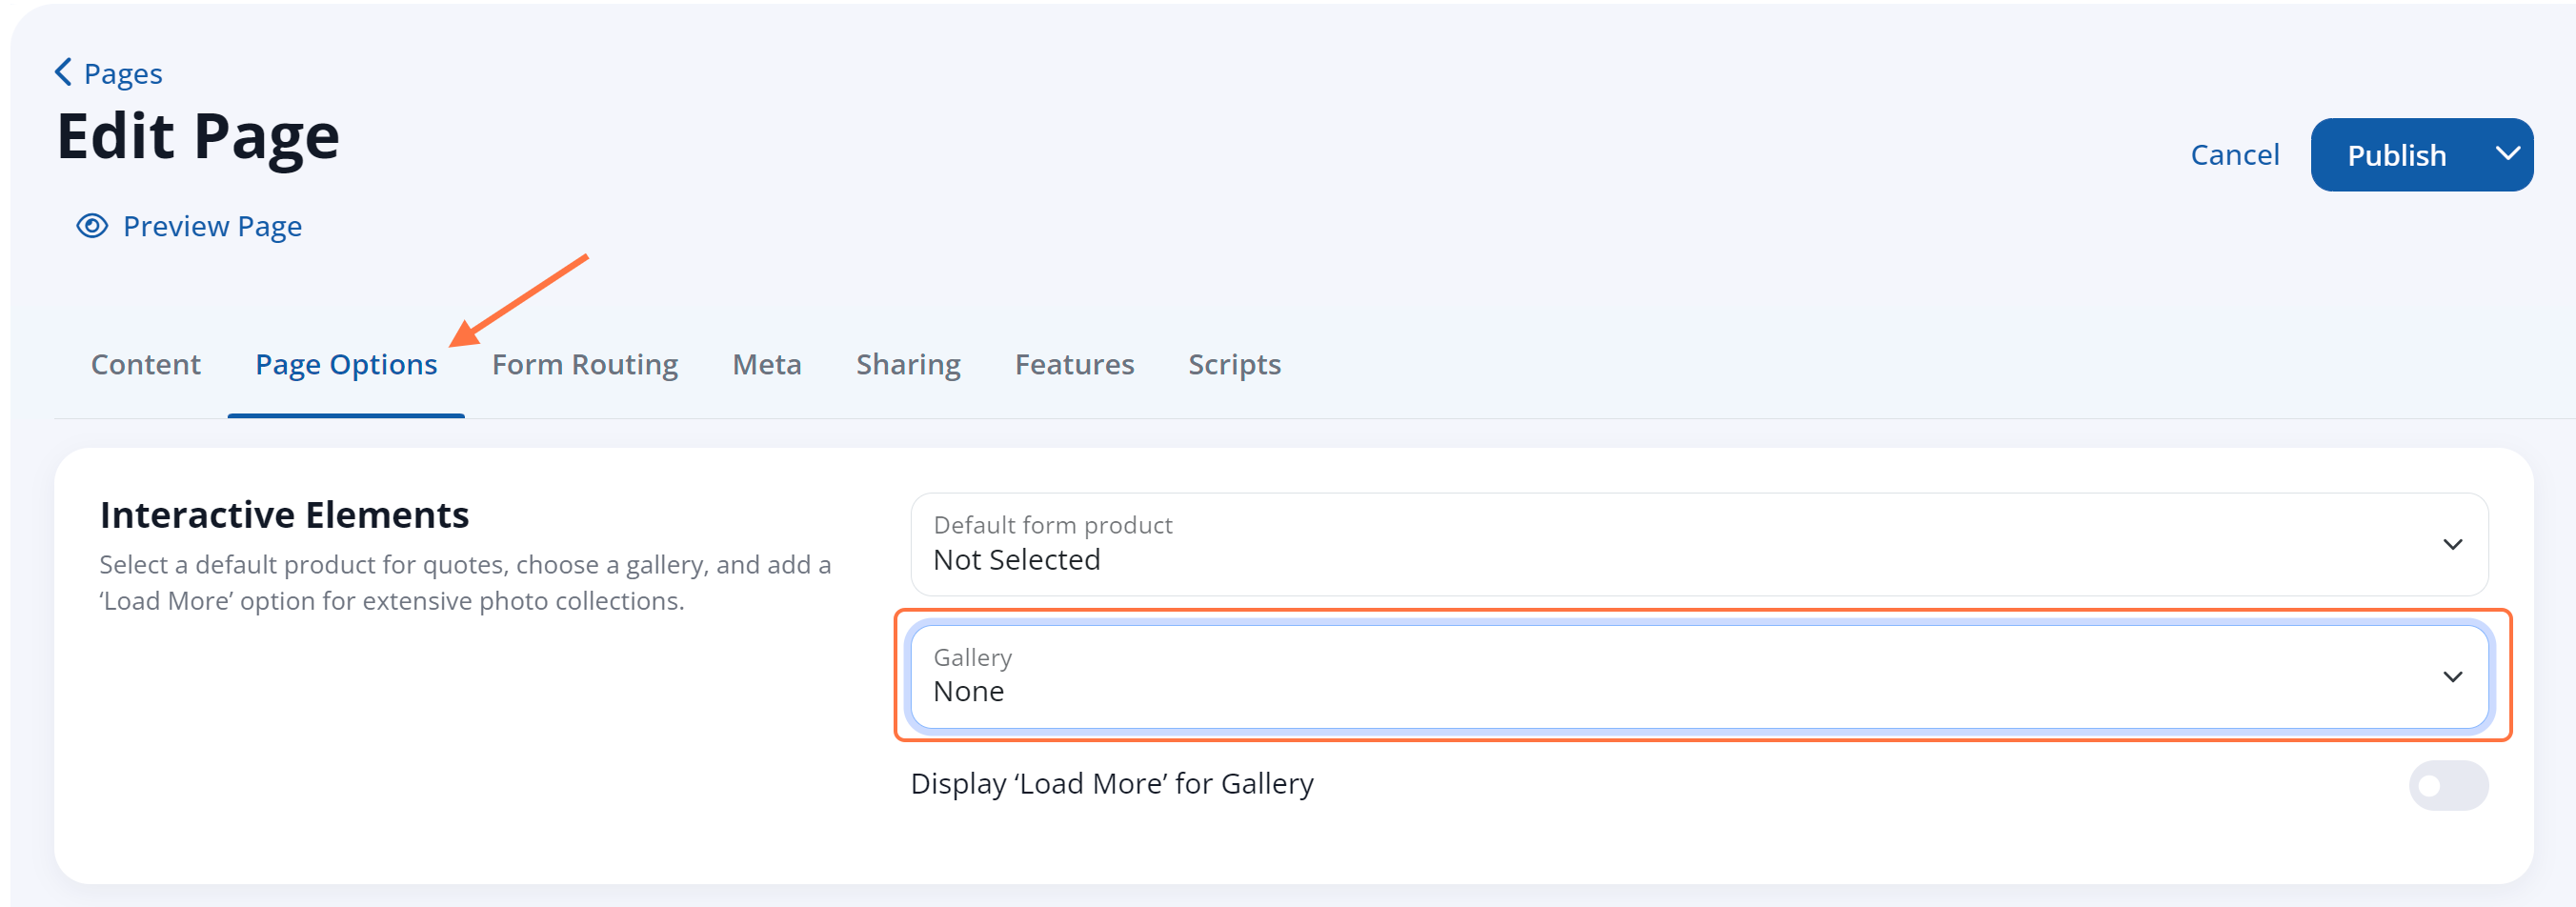
Here are some notes on the Page Gallery field:
- Choosing None will display no gallery on the page.
- Choosing Use Parent Page Gallery will display the default gallery (ID 0121). If you have deleted the gallery with ID 0121, then no gallery will appear.
- Choosing a specific gallery will display that gallery on the page.
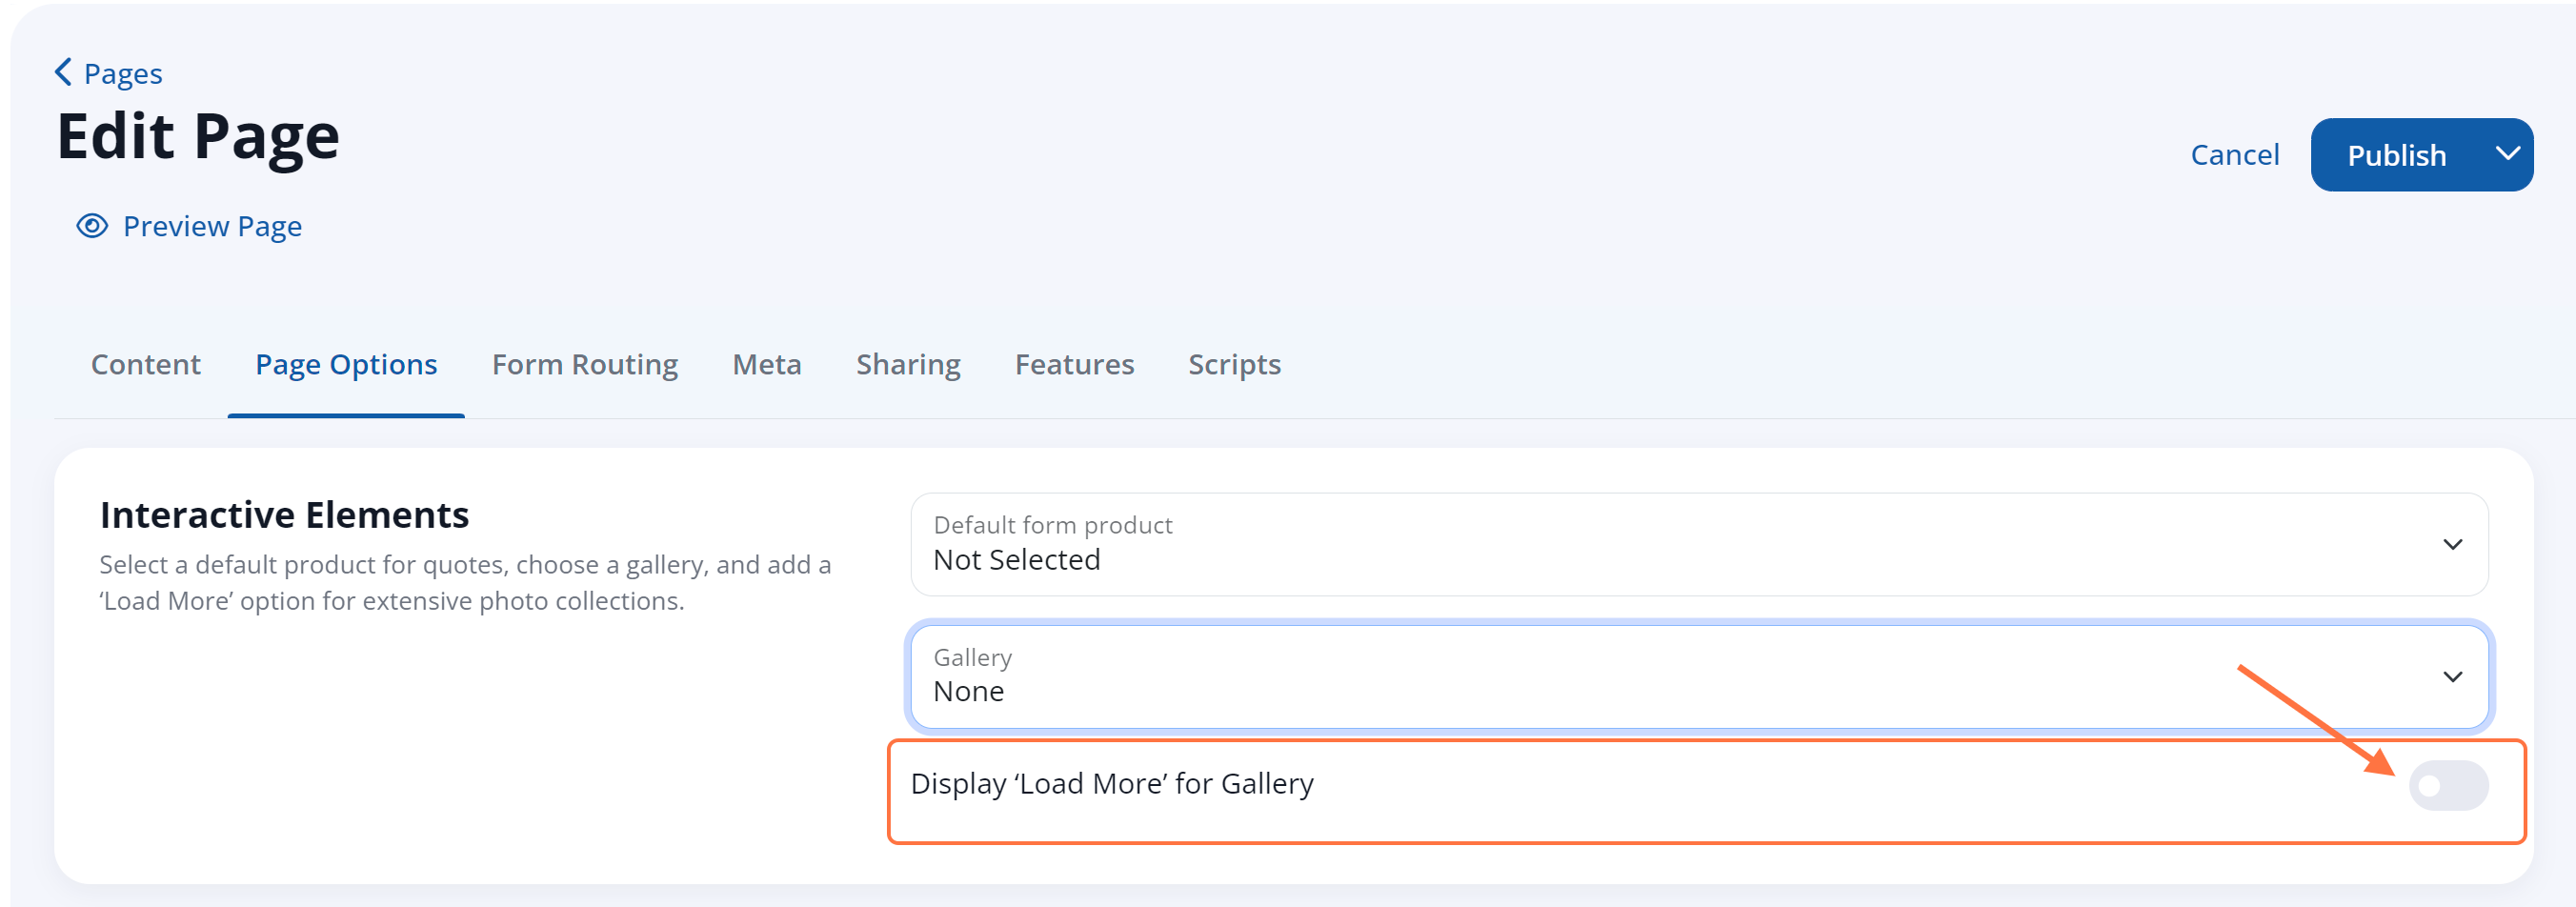
Under the dropdown menu, you can also decide whether you'd like to display a "load more" link:
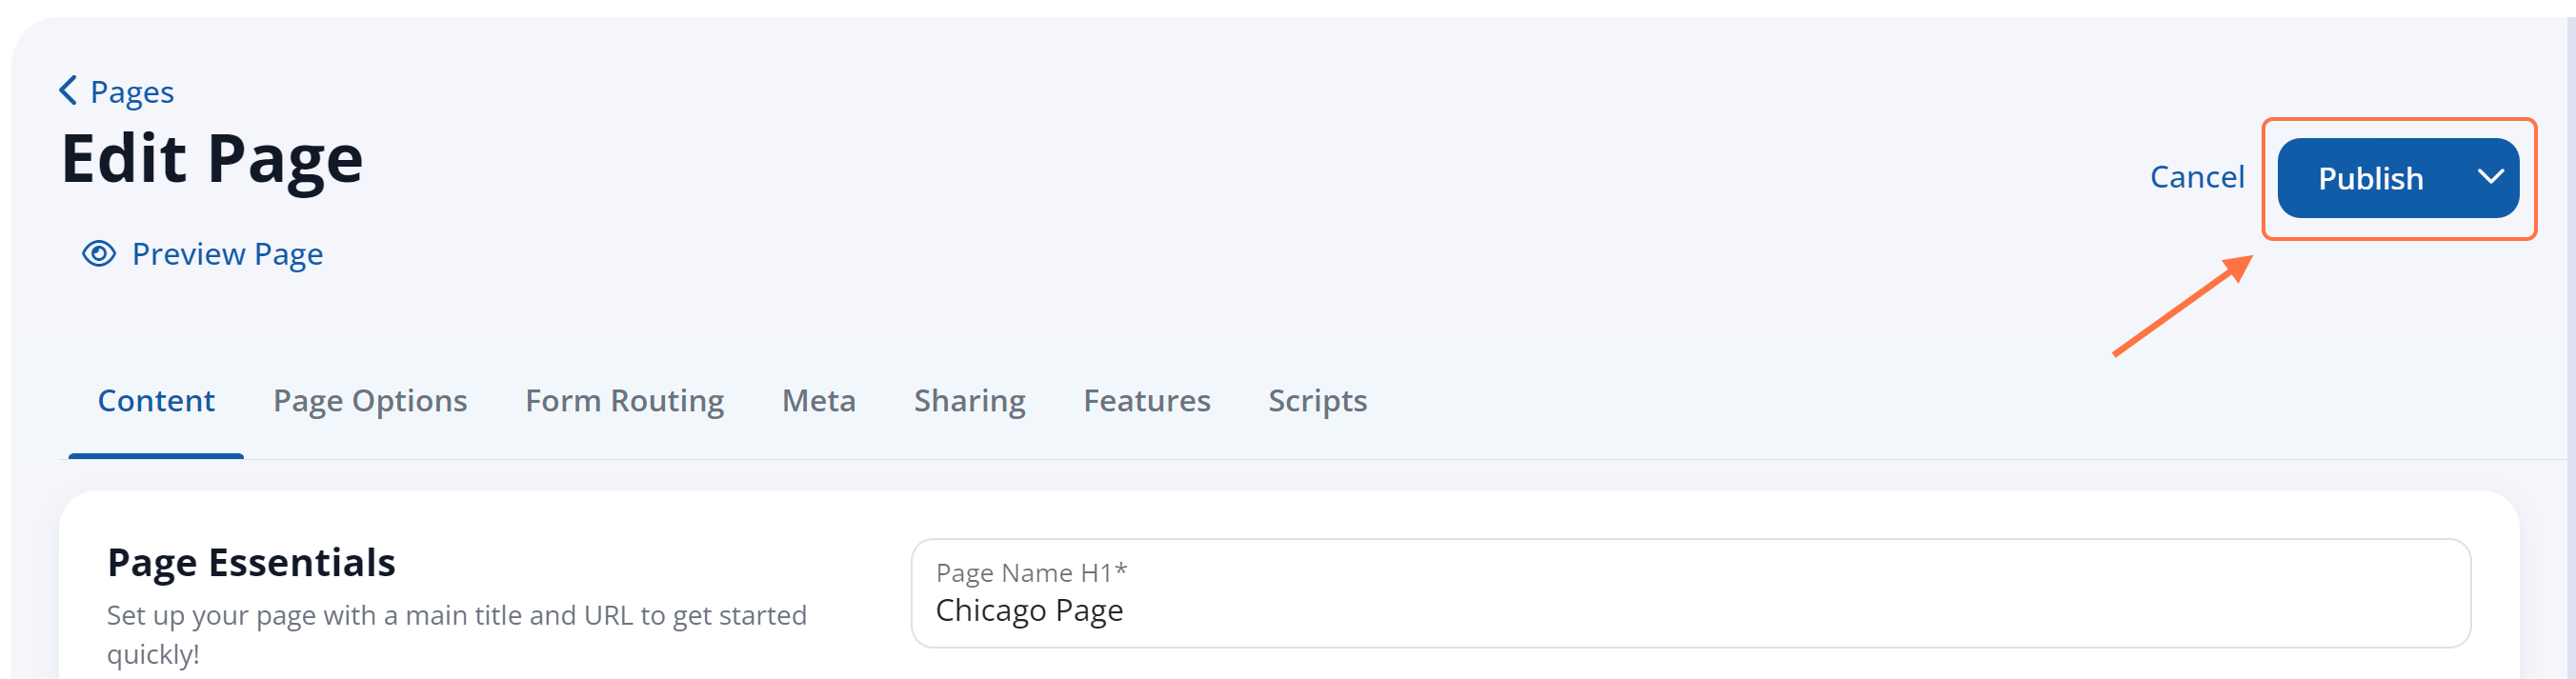
4. Save Your Changes
Once you've selected your media gallery, click Publish at the top of the page to save your changes live on the site.
You can repeat the instructions above on a page-by-page basis to add galleries to multiple pages. If you have many pages to change, fill out a support ticket or reach out to your Spectrum Client Manager to request assistance with bulk page edits.