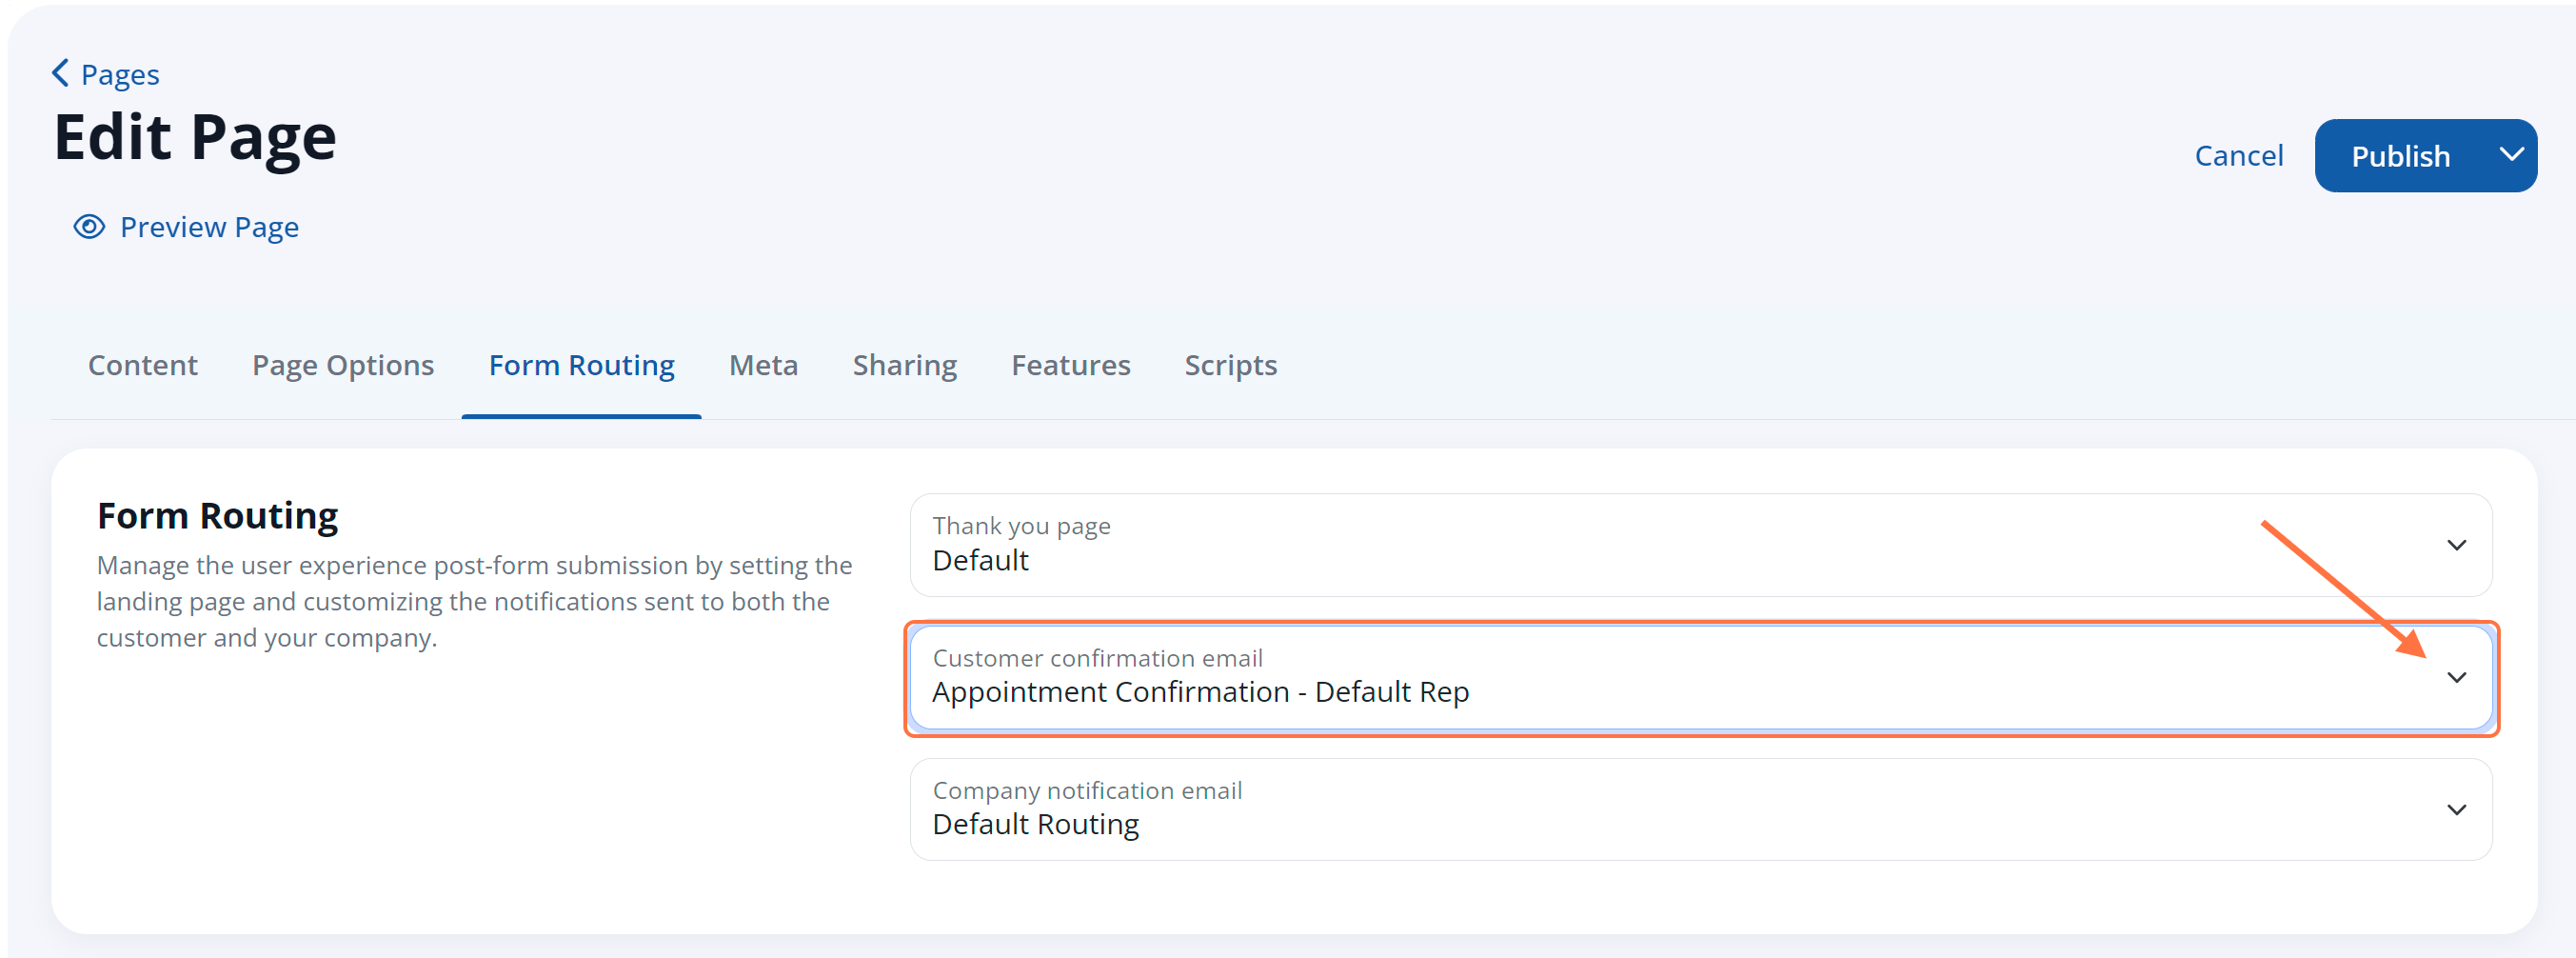
The Form Routing section of any page (accessible under Website > Pages) allows you to set custom rules whenever a website visitor submits the form on this particular page. Using the Customer Confirmation Email and Company Notification Email fields shown below, you can select specific email templates to be sent in response to this page's form submission.

What Is the Default Routing?
By default, every page's form result email will be set to the Default Routing.
You can check which template is the default by going to Settings > Notifications > Email Templates, filtering for the "Quote" type, and looking for the Active toggle that's enabled. There can be only one default email type active for Quotes.
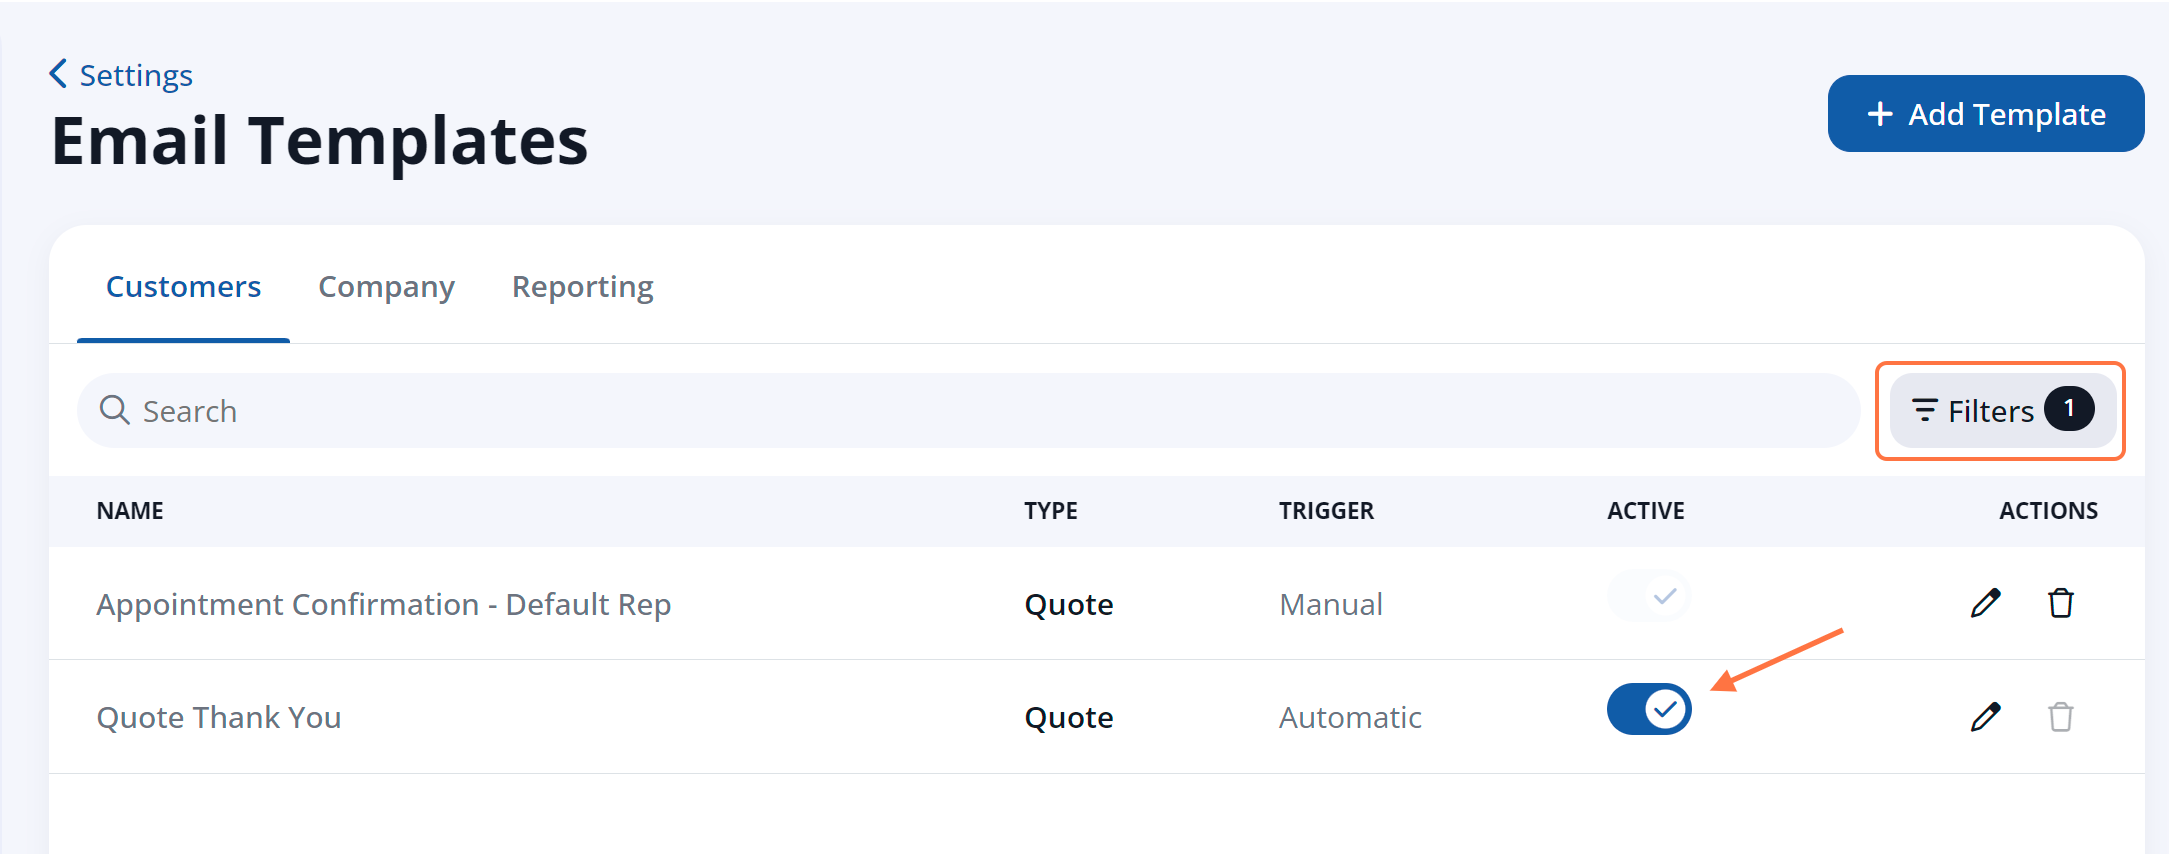
Please note that there will be a default Quote email for both Customers and Company; you can use the tabs at the top of the Email Templates page to switch between the two.
What Are the Other Email Notification Options?
If you would like to change the customer confirmation email or customer notification email template (away from the default routing), then simply click into the relevant dropdown menu and choose your preferred email template. Then save your changes.
For example, in the case below, there is one other option for the customer email: Appointment Confirmation - Default Rep.
How Can I Add a New Email Template to the Dropdown Menu?
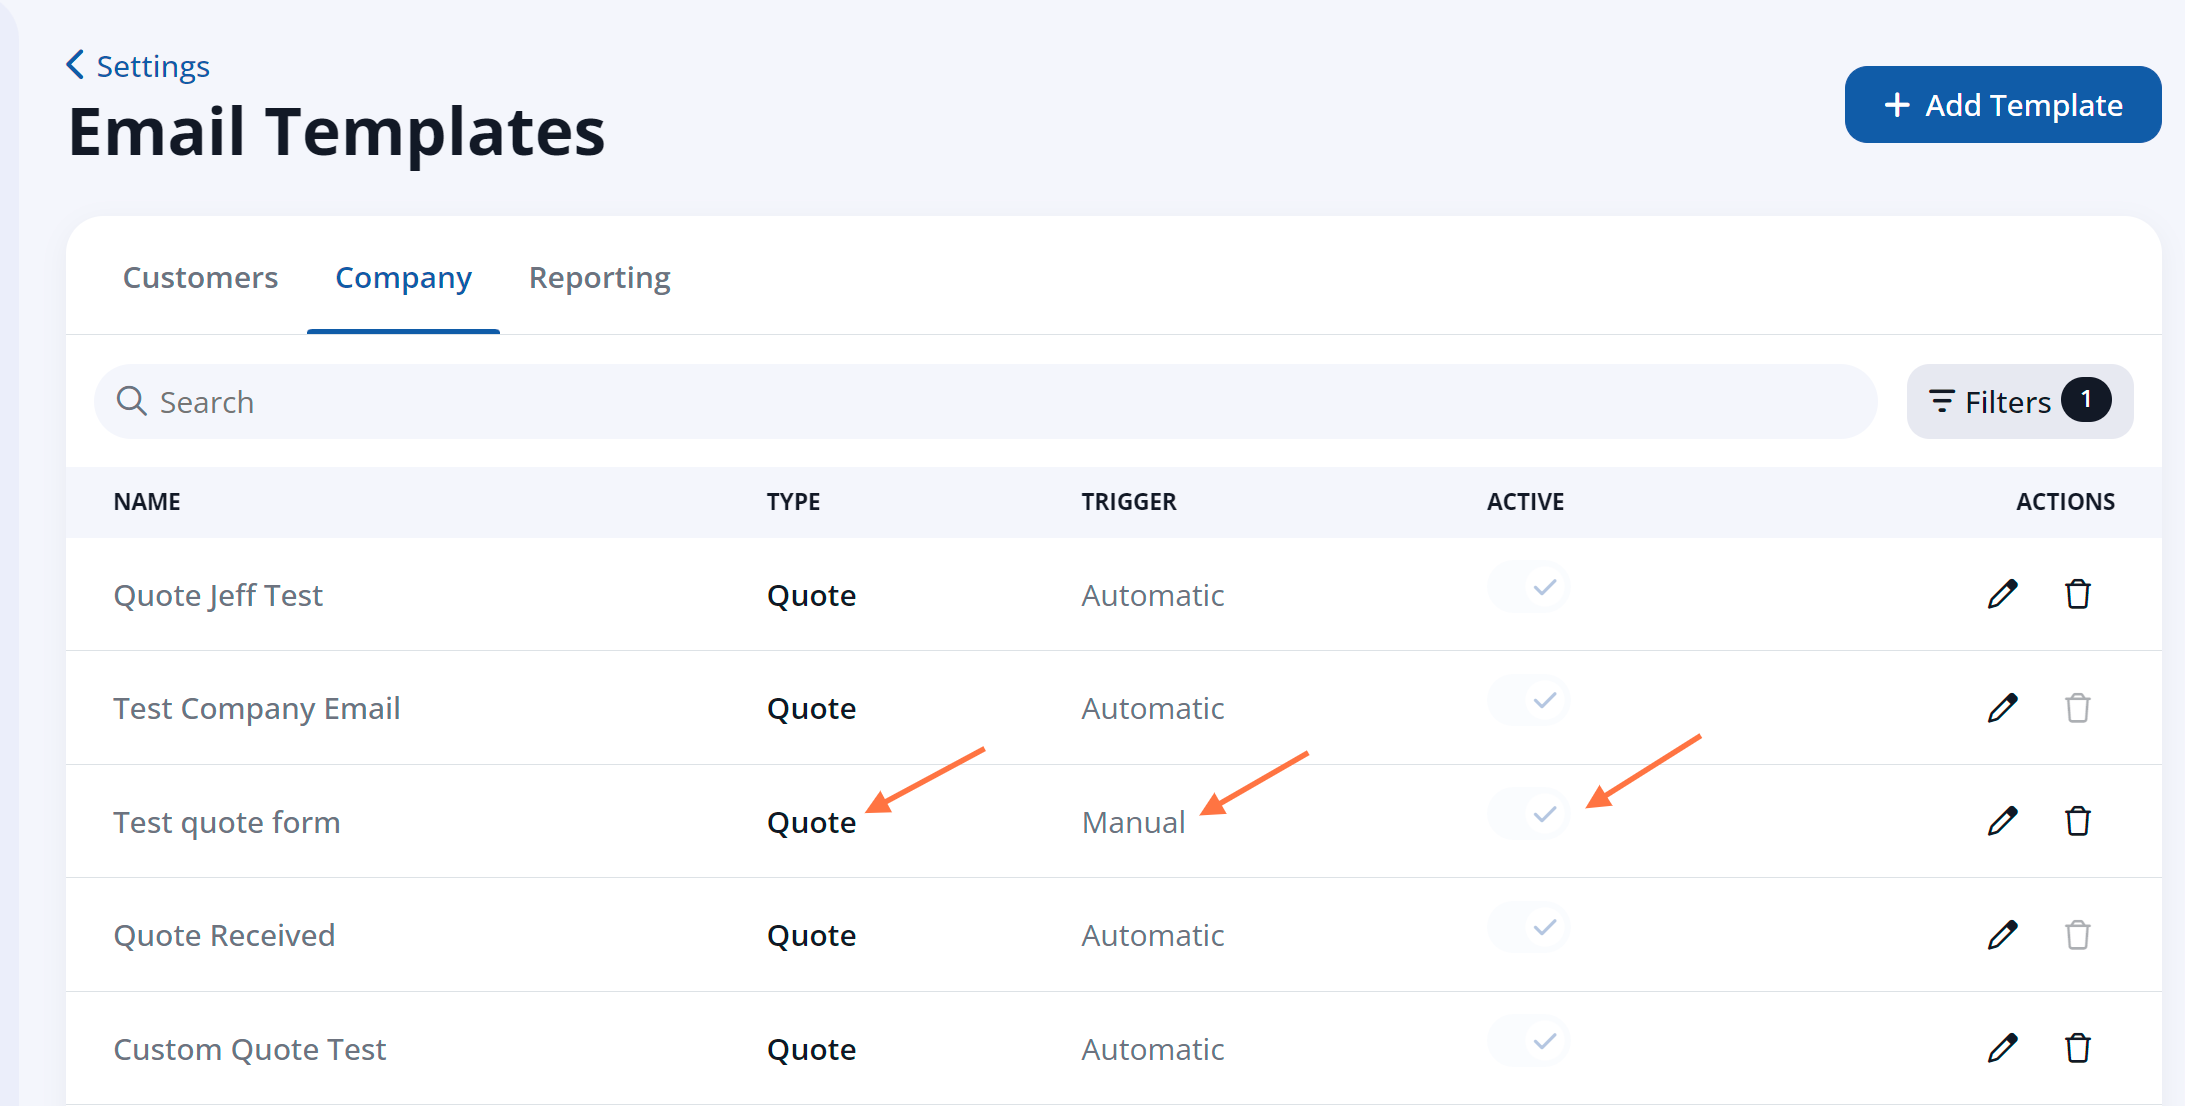
The email templates that you can choose from within the Form Result dropdown menus are controlled under Settings > Notifications > Email Templates (and then under the relevant tab for Customers or Company).
In order for an email template to appear in the Form Result dropdown menu shown just above, the email template must be:
- The "Quote" type
- Set to manual
- Active
See an example of these settings below.
Thus, to add a new company or customer email template to the dropdown menu in Form Result, you can go to Settings > Notifications > Email Templates, create a new customer or company email template, customize it, and choose the settings just above. Then go back to the page (Website > Pages) and choose the email template you just created.
For more detailed instructions, refer to this article on how to create a customer email template or how to create a company email template.