Did you know you can email yourself consent records for each lead? Learn more about the Know Your Customer feature!
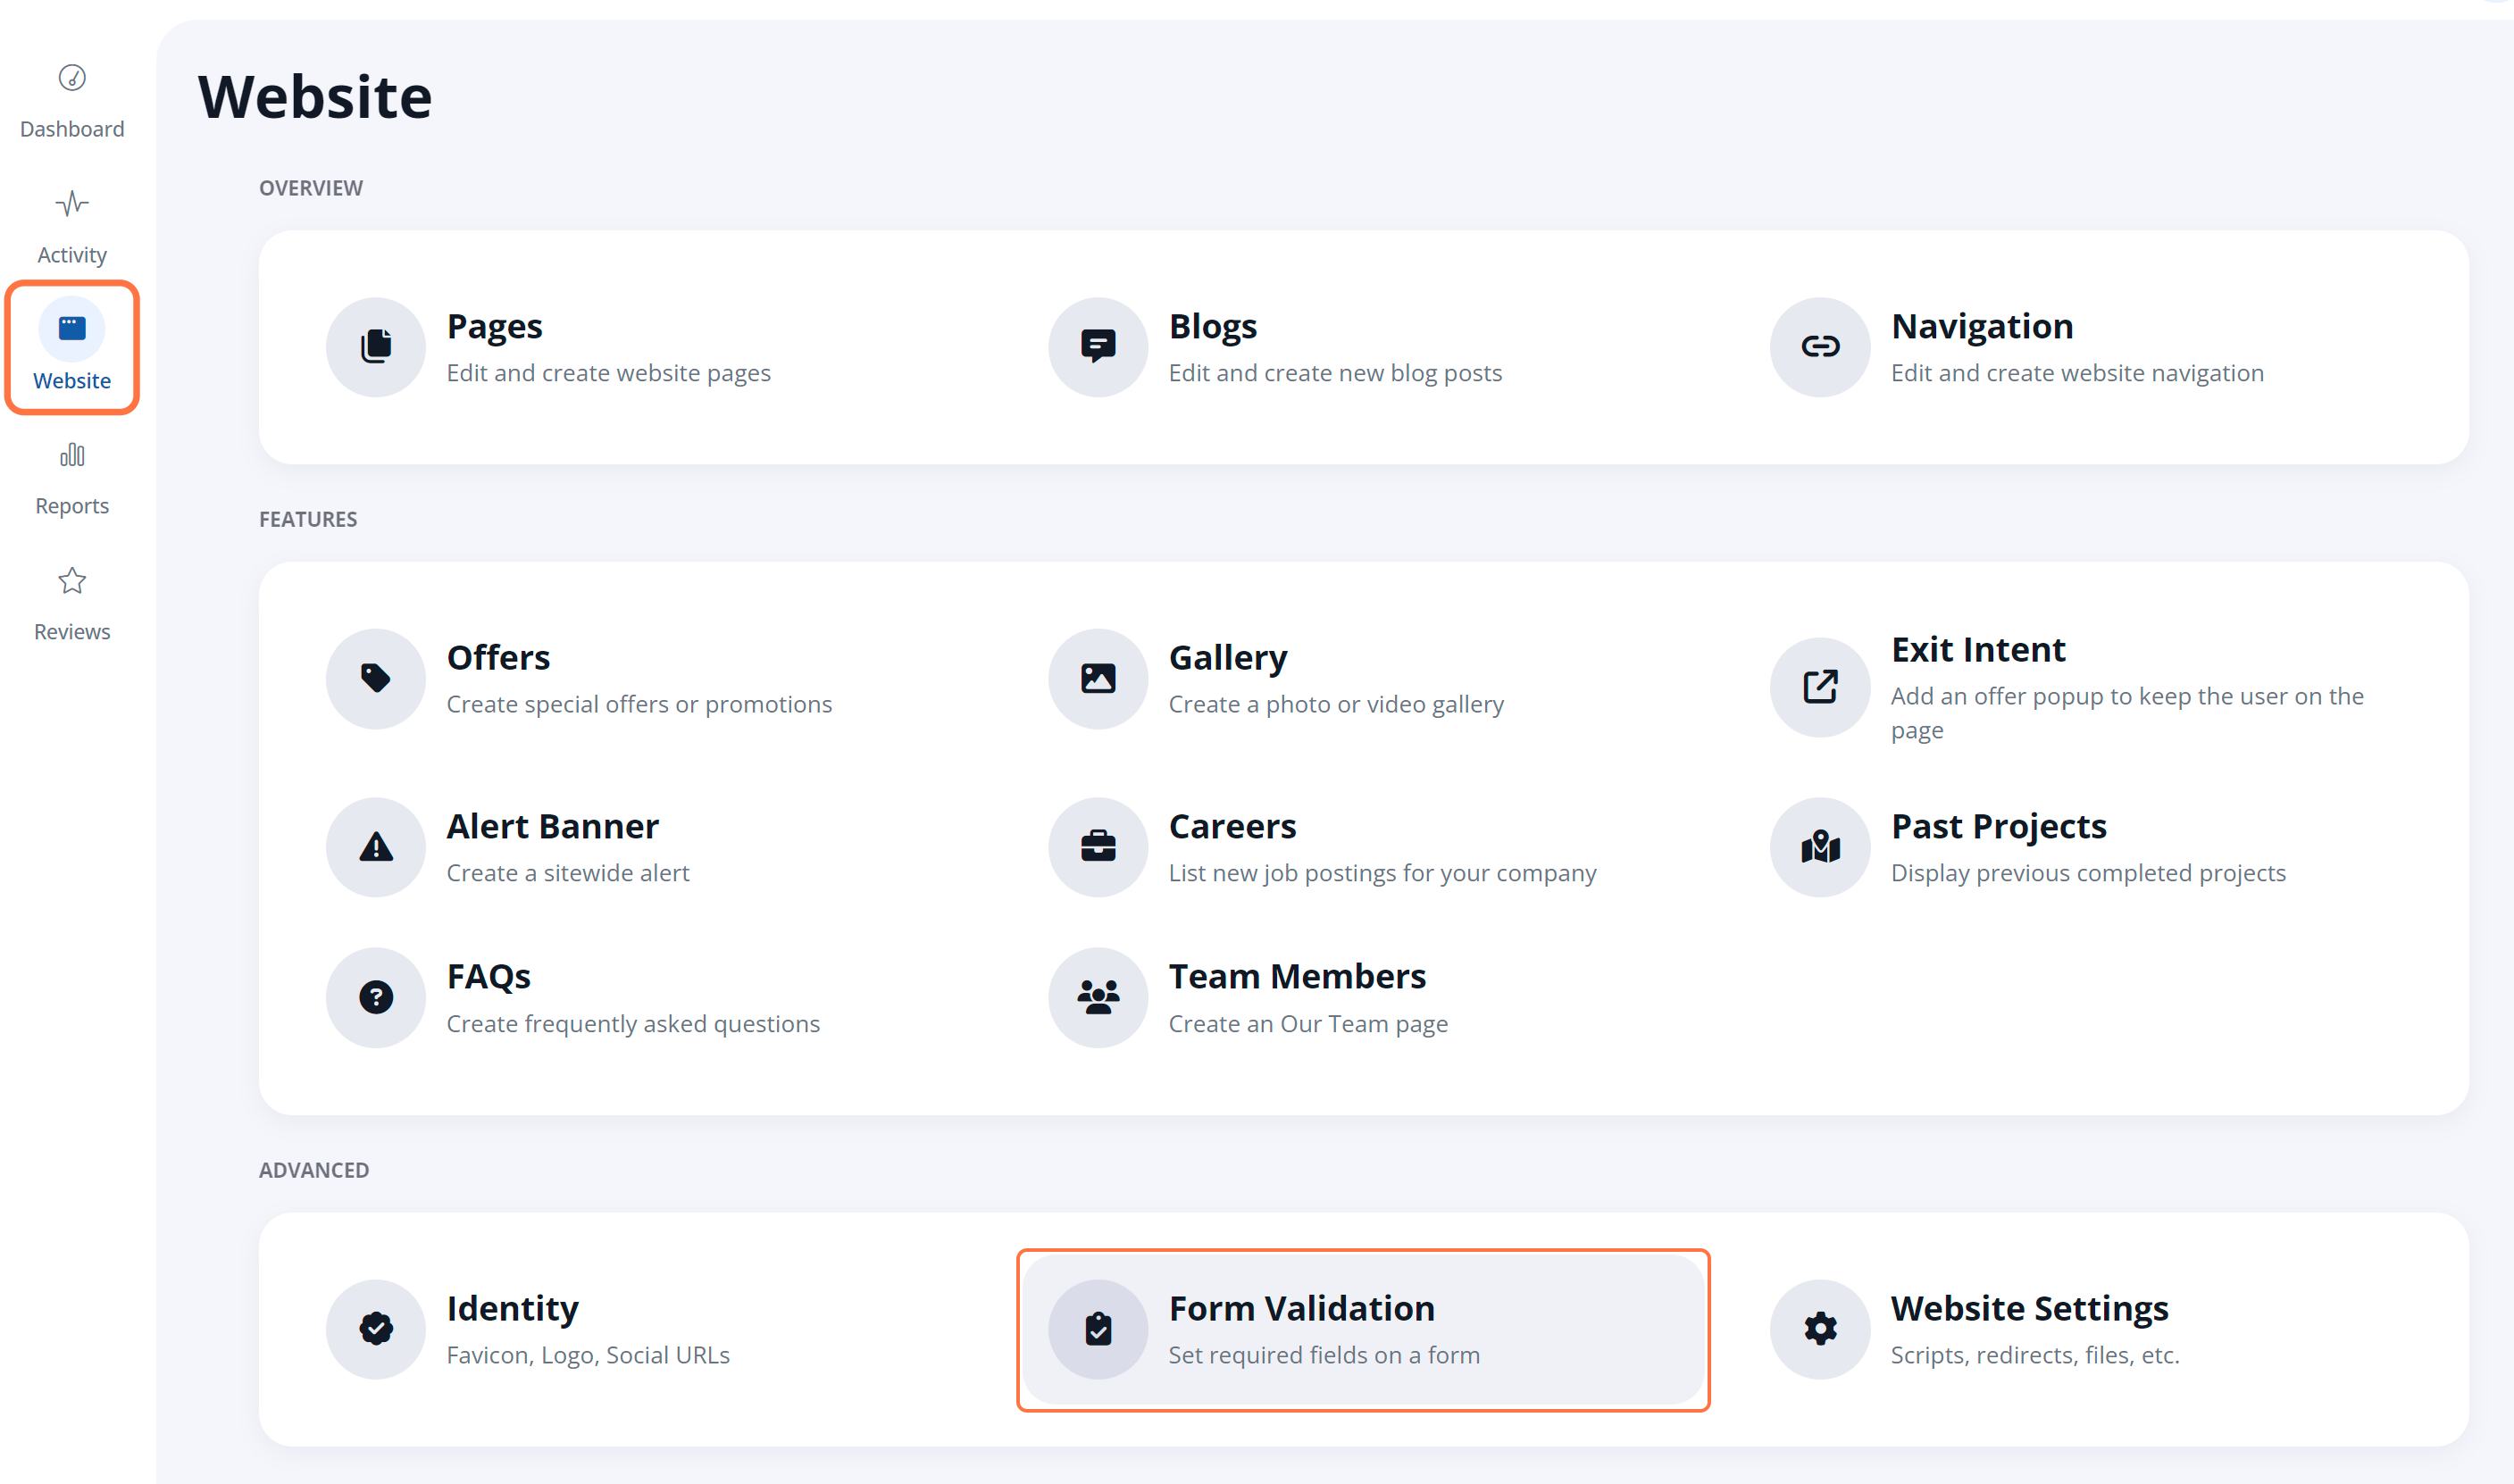
1. Navigate to Form Validation
After signing in to the LISA admin, navigate to Website > Form Validation.
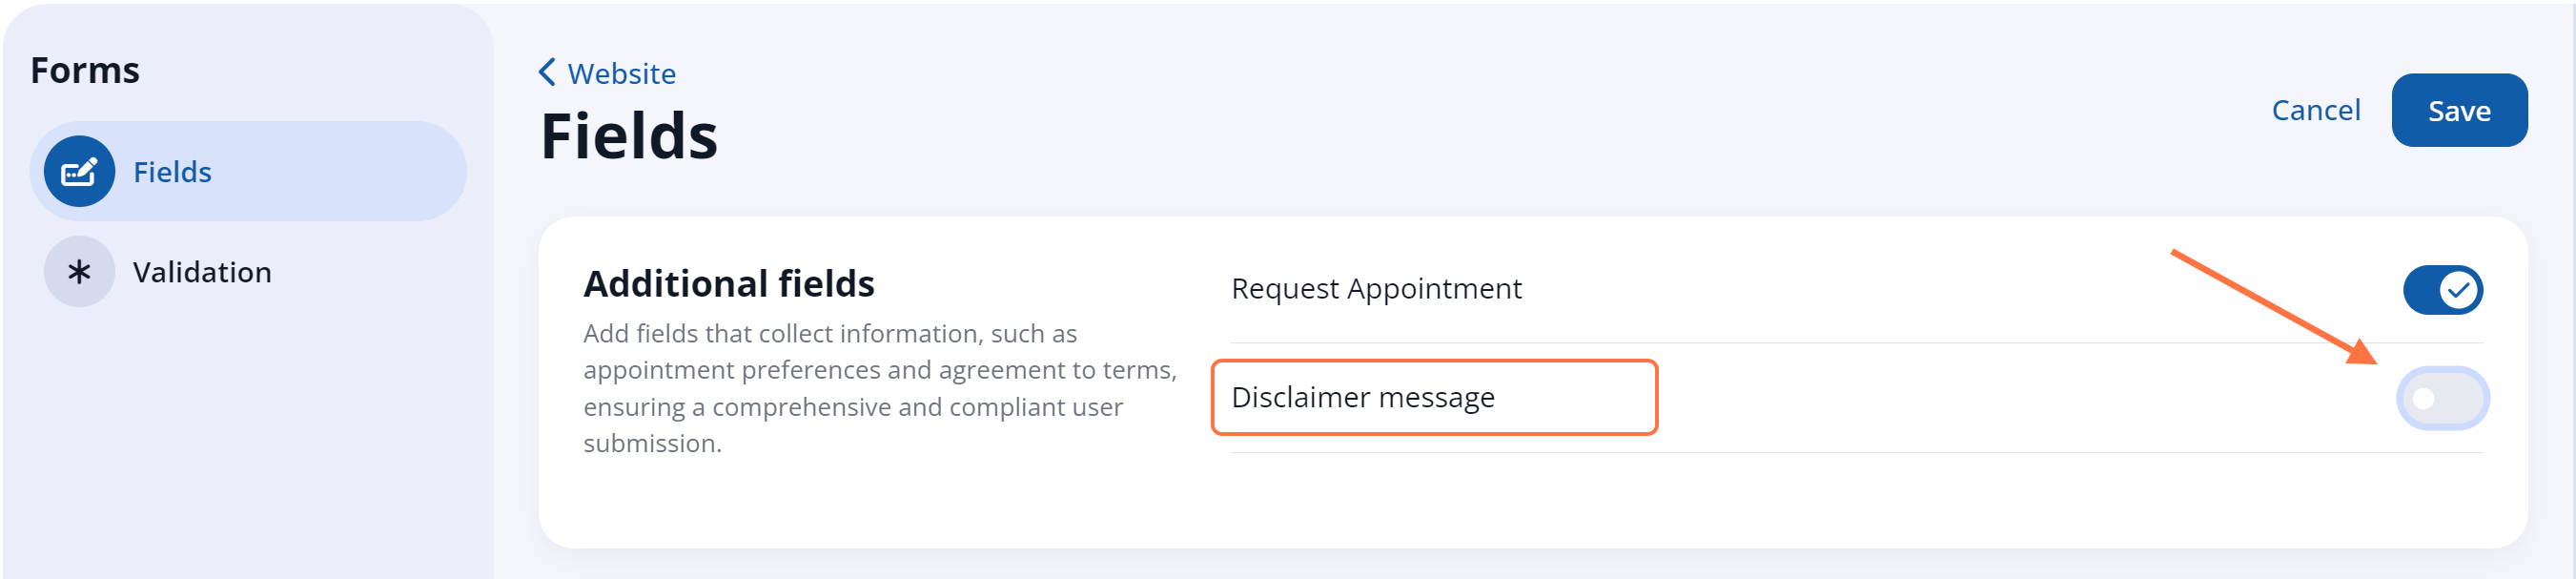
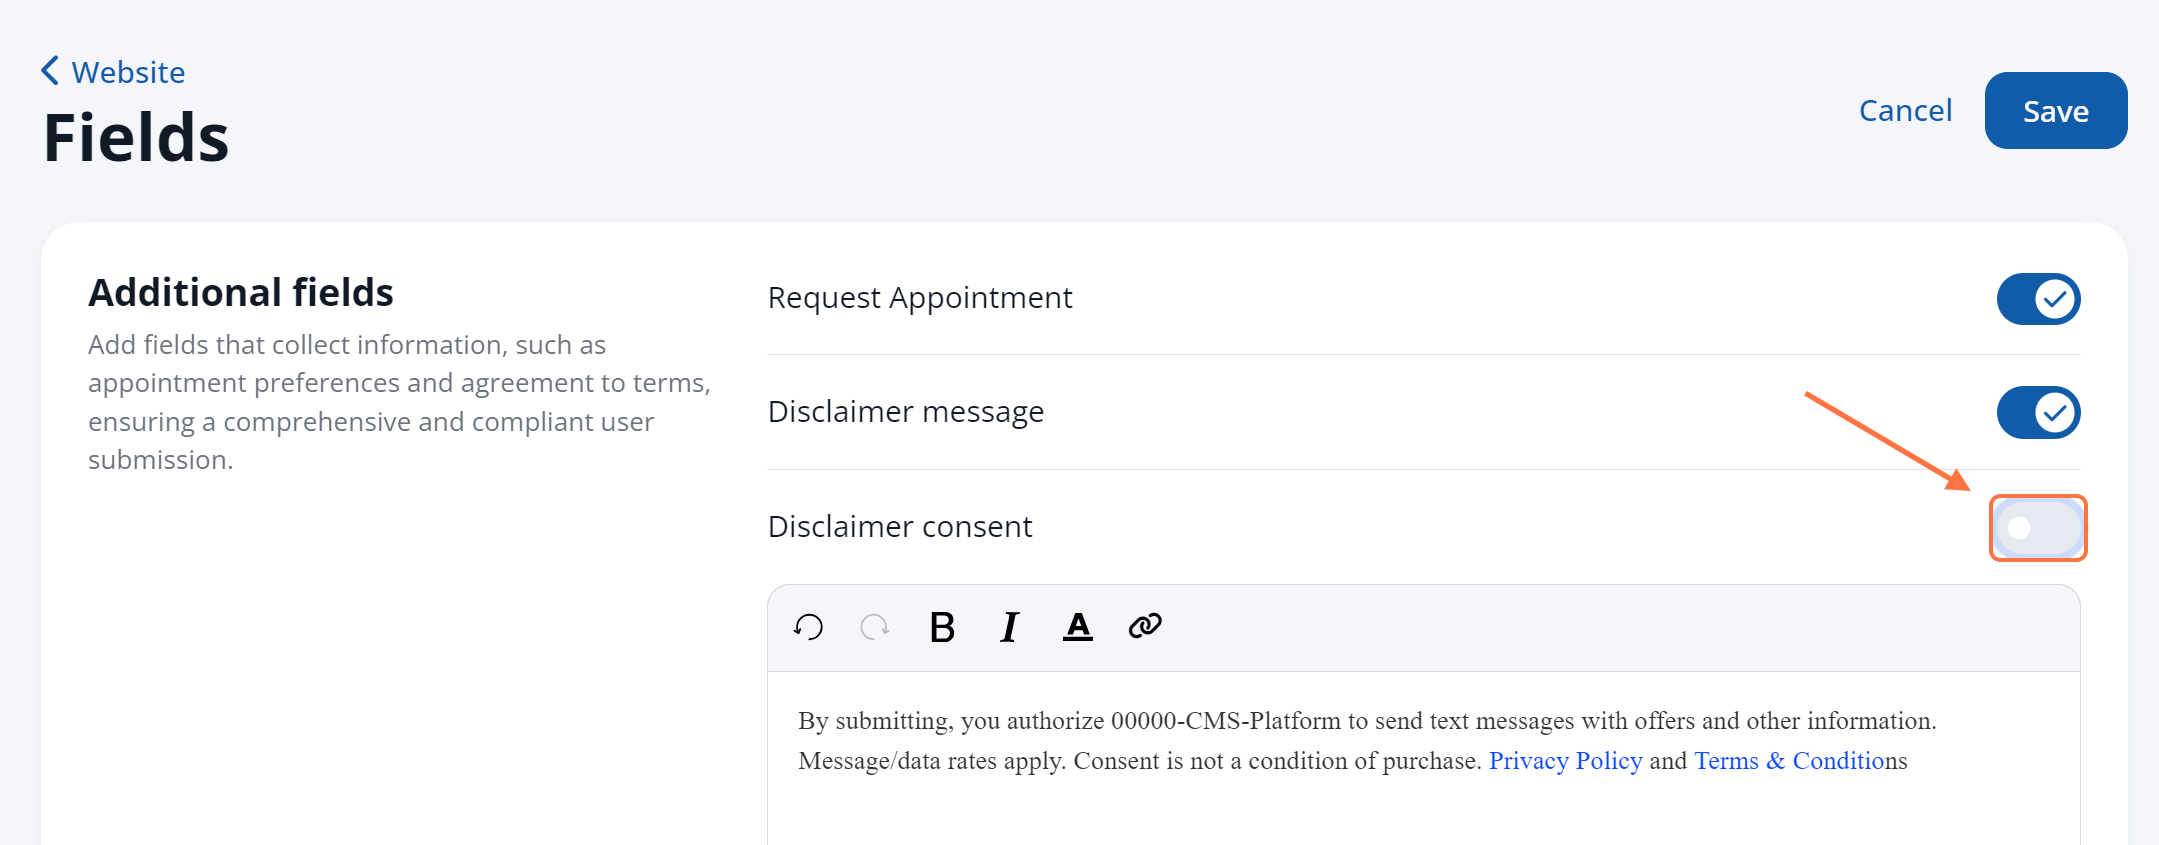
2. Enable Disclaimer Messaging
Click on the toggle for Disclaimer message within the Additional Fields section.
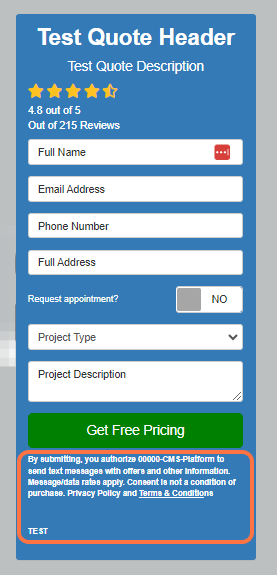
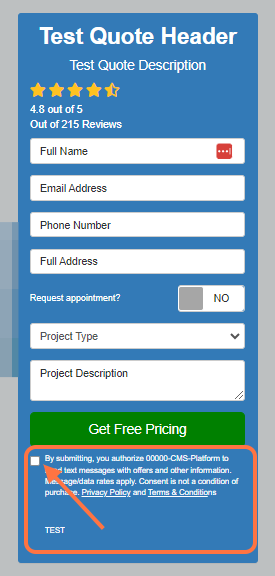
This will cause standard disclaimer text to appear on your website forms, as shown below:
Enabling this disclaimer will also open up additional options for adding a disclaimer consent checkbox and customizing the disclaimer messaging.
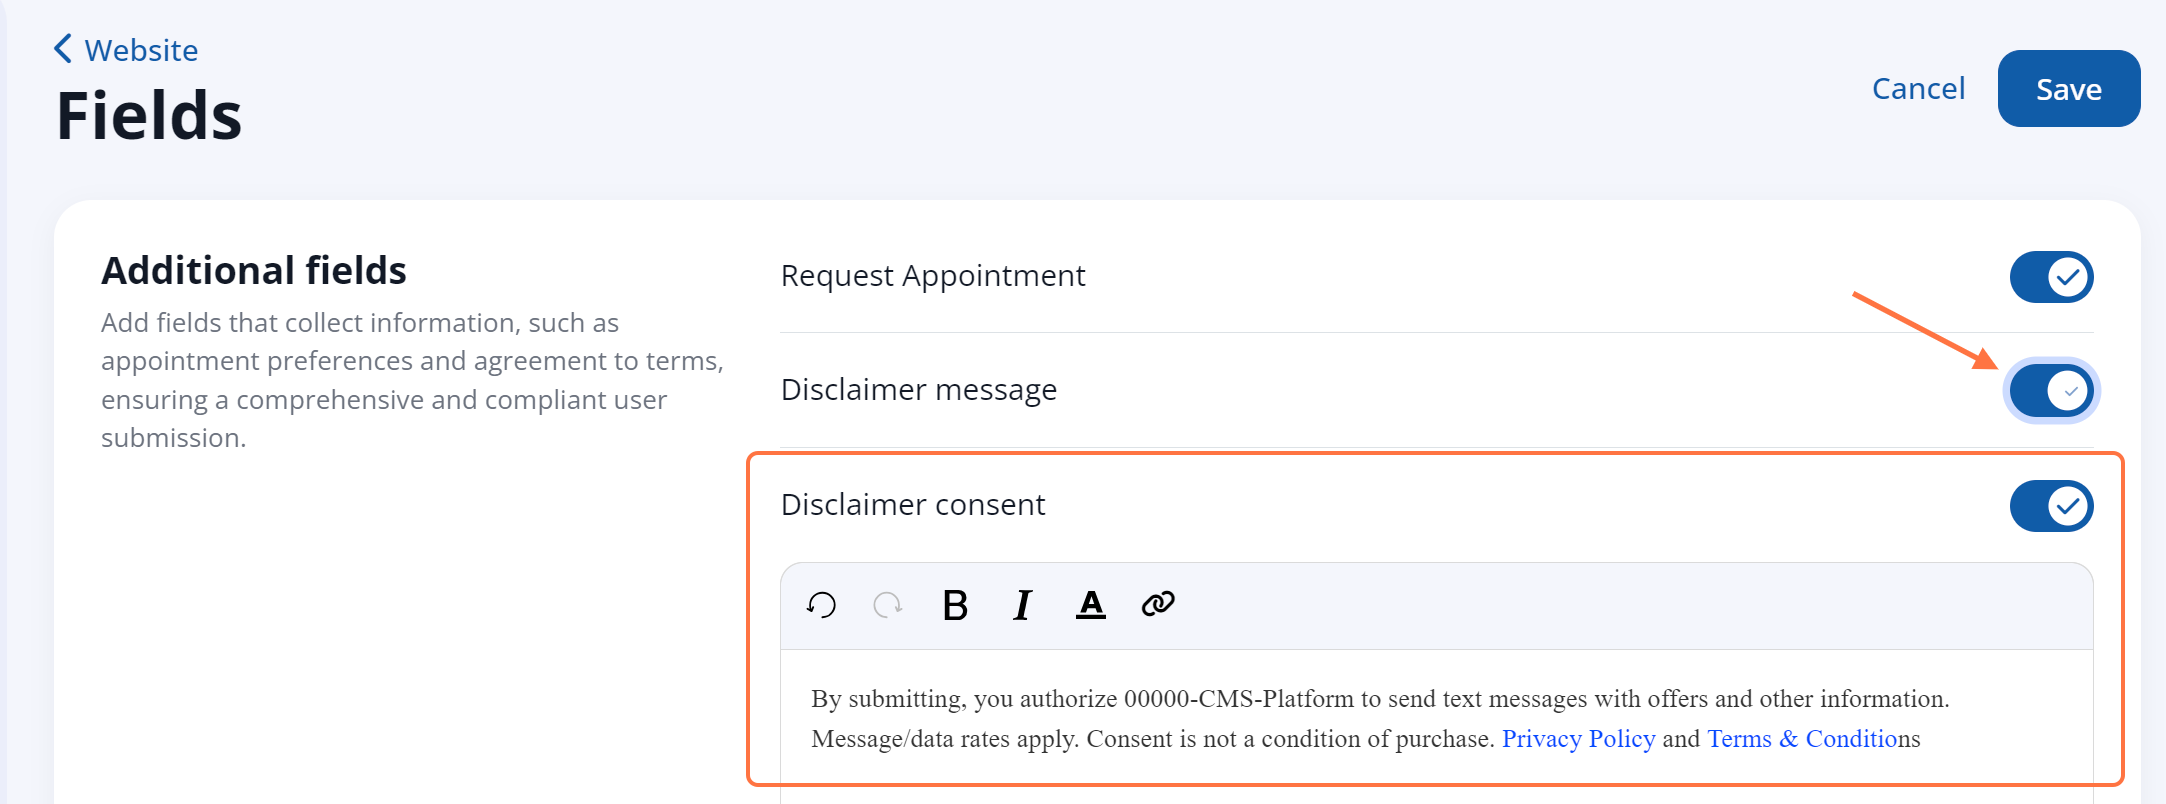
3. Disable Disclaimer Consent Checkbox (if Desired)
When enabling the Disclaimer message, the Disclaimer consent field will be enabled by default. This will add a checkbox to the disclaimer message in the site forms, as shown below:
To disable the Disclaimer consent checkbox, click on the toggle to move it to the off position.
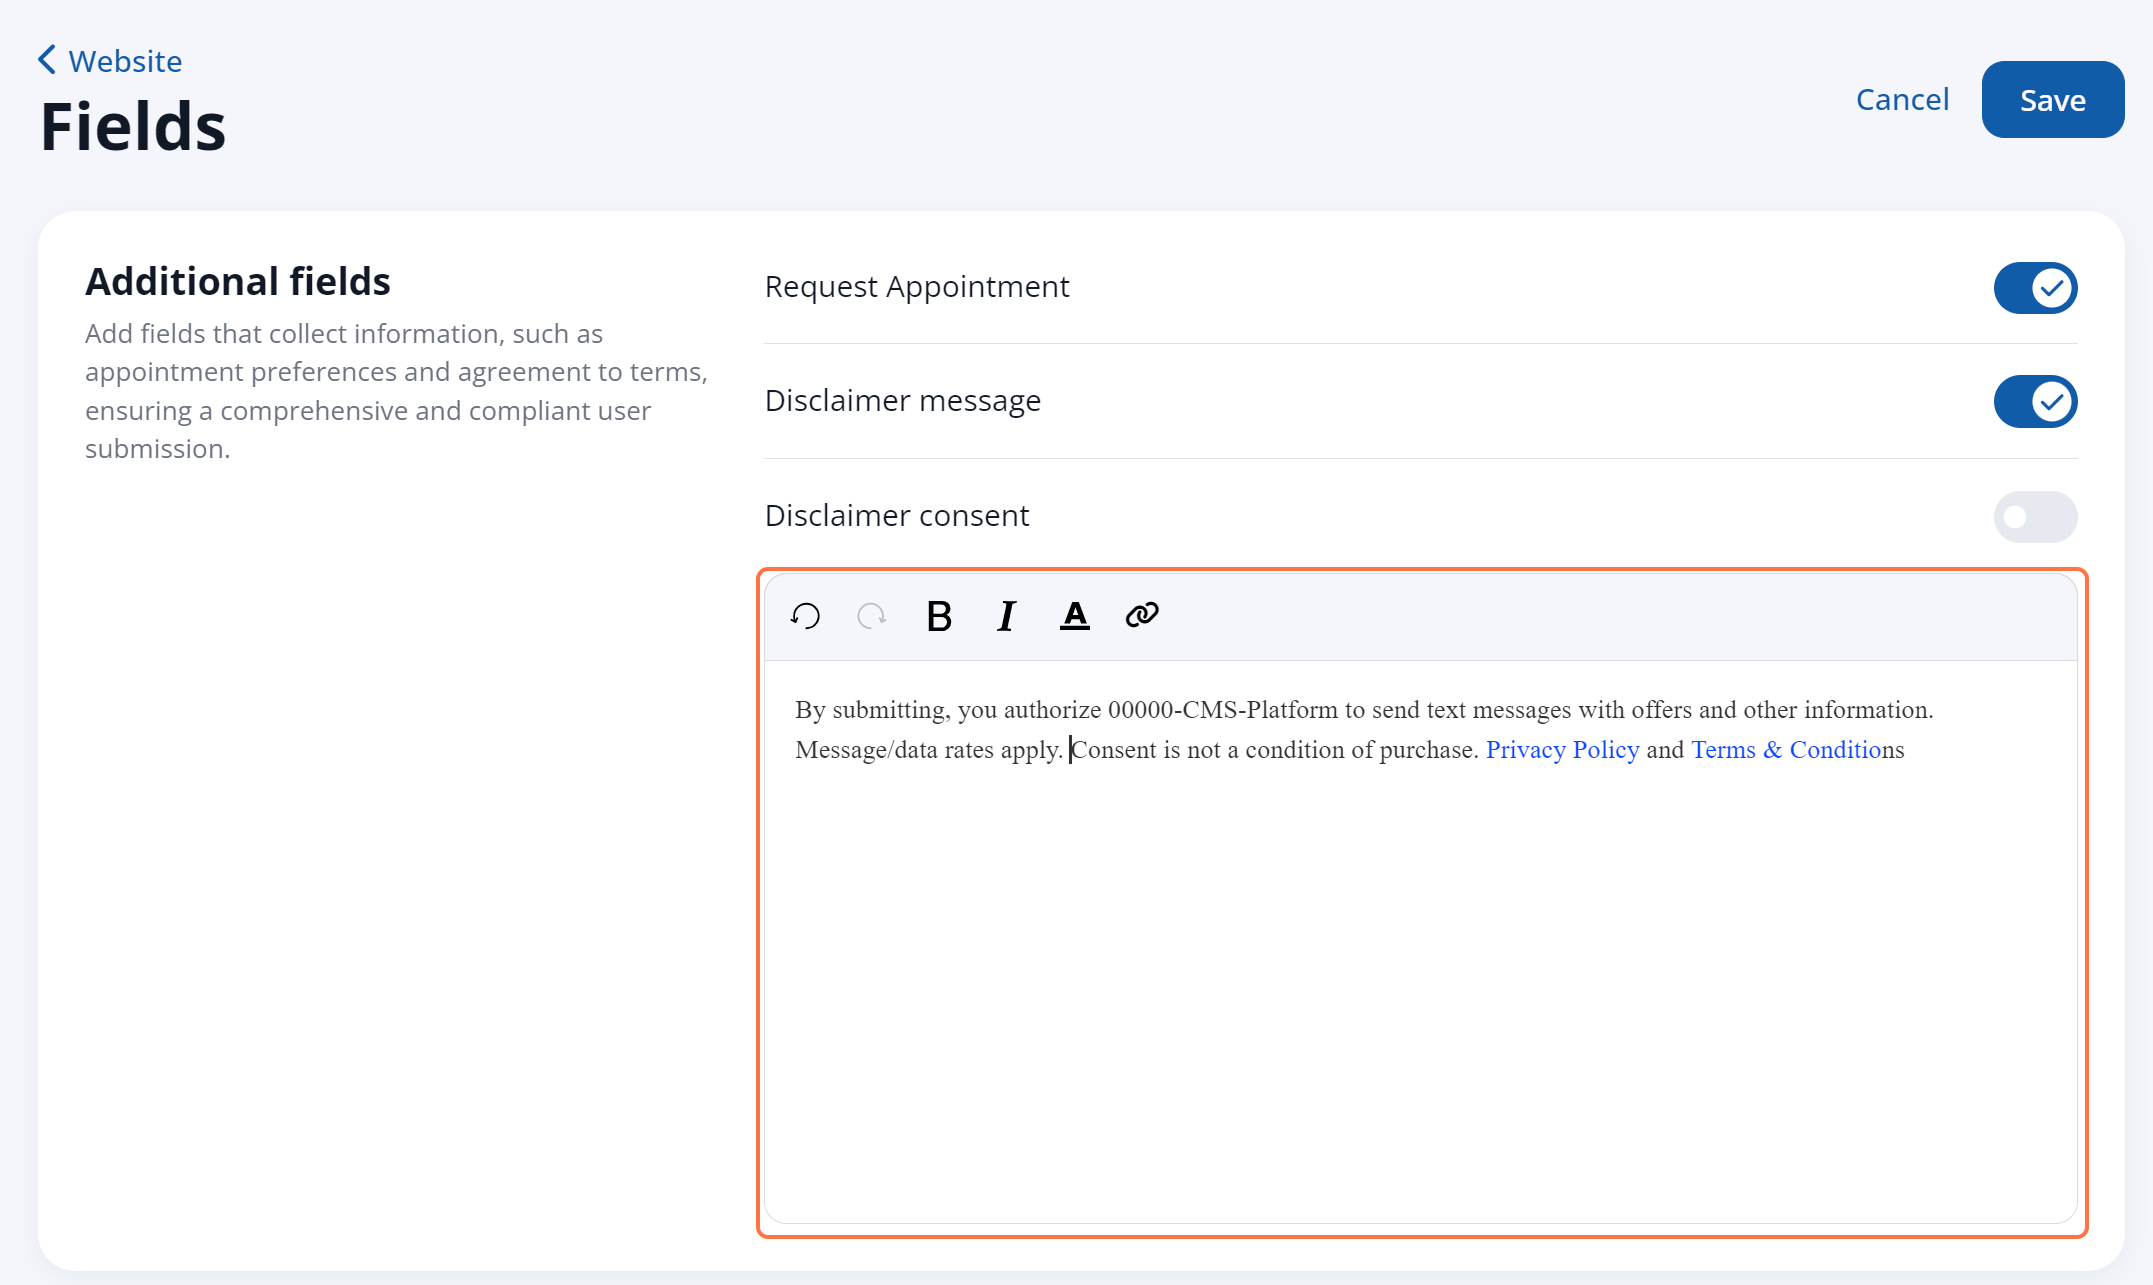
4. Edit the Disclaimer Message (if Desired)
You can then customize the disclaimer message that will appear in forms on your site within the editor. Use the editing tools to add bolding, italics, and links if desired.
Learn more about documenting and managing consent for leads with these resources: