Each page of your LISA platform can be edited and customized in nearly every way. The options may vary slightly from page to page, but they'll always be presented to you in expandable page sections (as shown below).
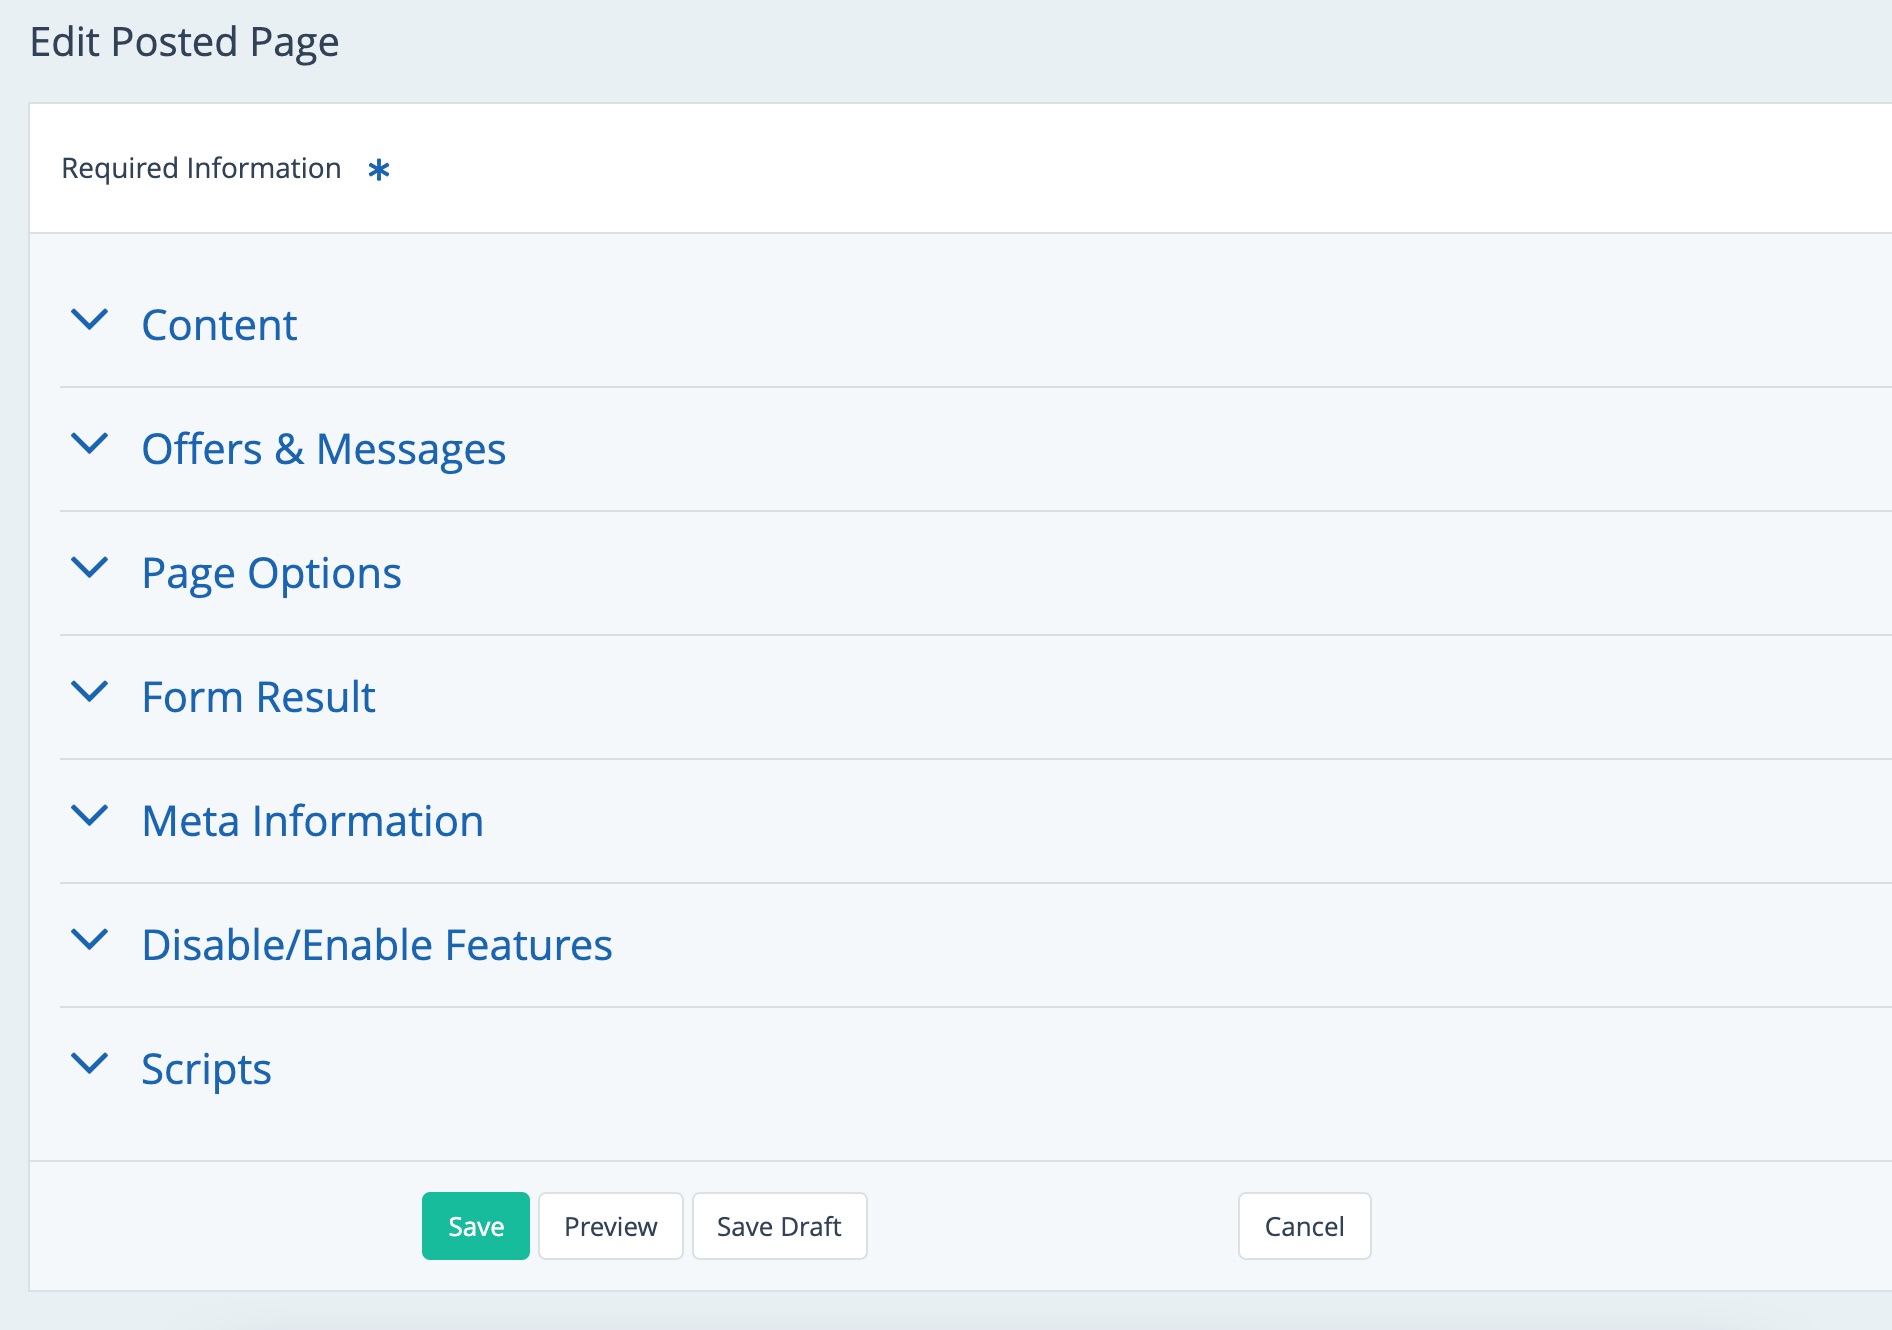
This article will explain each of these page options in detail and will provide more information as needed. Scroll down to learn more, or click within the list below to jump to the section in question:
If you aren't familiar with Site Content > Pages, start with our overview of Pages or learn how to add a new page to your site. Keep in mind that you must have the Content Manager role to access Pages.
Content
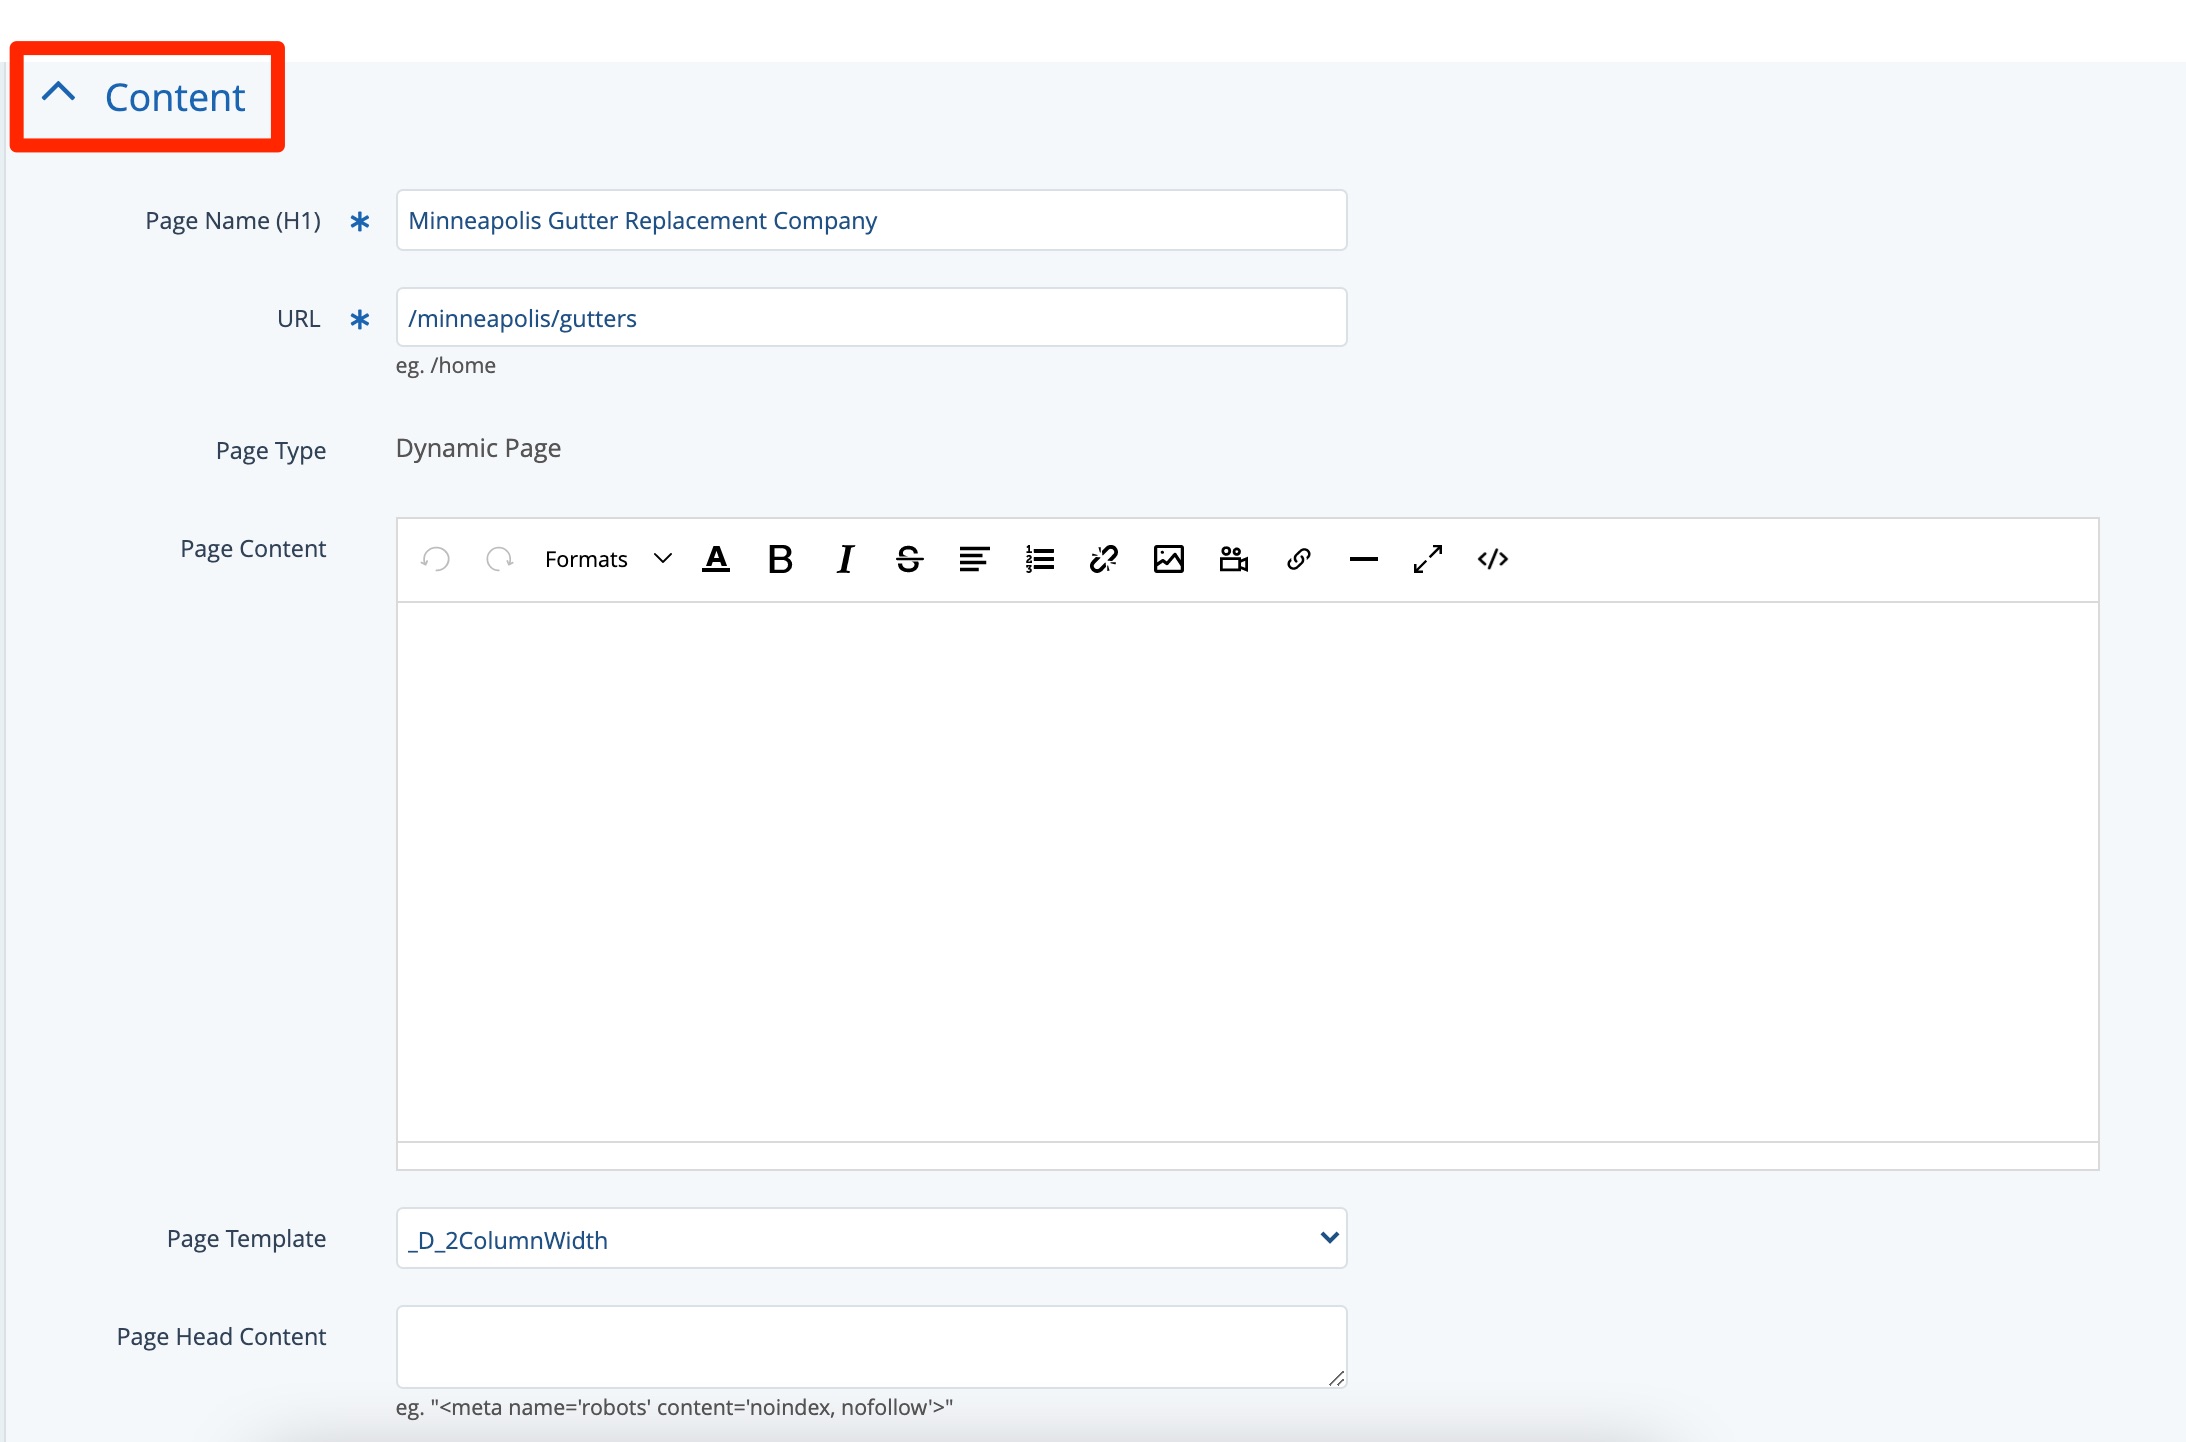
The Content section of page info allows you to control:
- Page Name (H1): This title will appear in the Pages list within the LISA admin and at the top of the page from the frontend of your website. The H1 is most important for SEO ranking, and it should contain the main page keyword.
- URL
- Page Content: This is the main text of your page.
- Page Template: The most common page template is _D_2ColumnWidth. Other templates are used for specialized cases and may require input from a Spectrum designer.
- Page Head Content: Page head content is commonly used to add header scripts to individual pages, like the "no follow" script shown in the example.
Offers & Messages
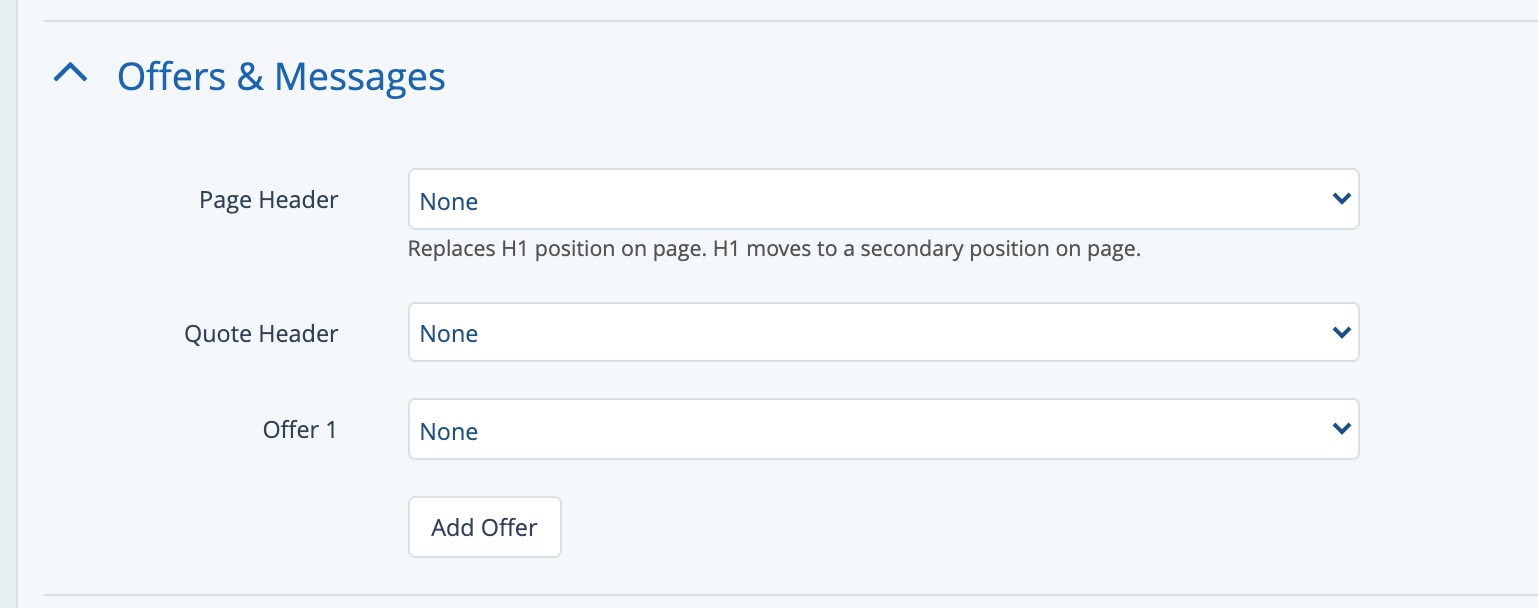
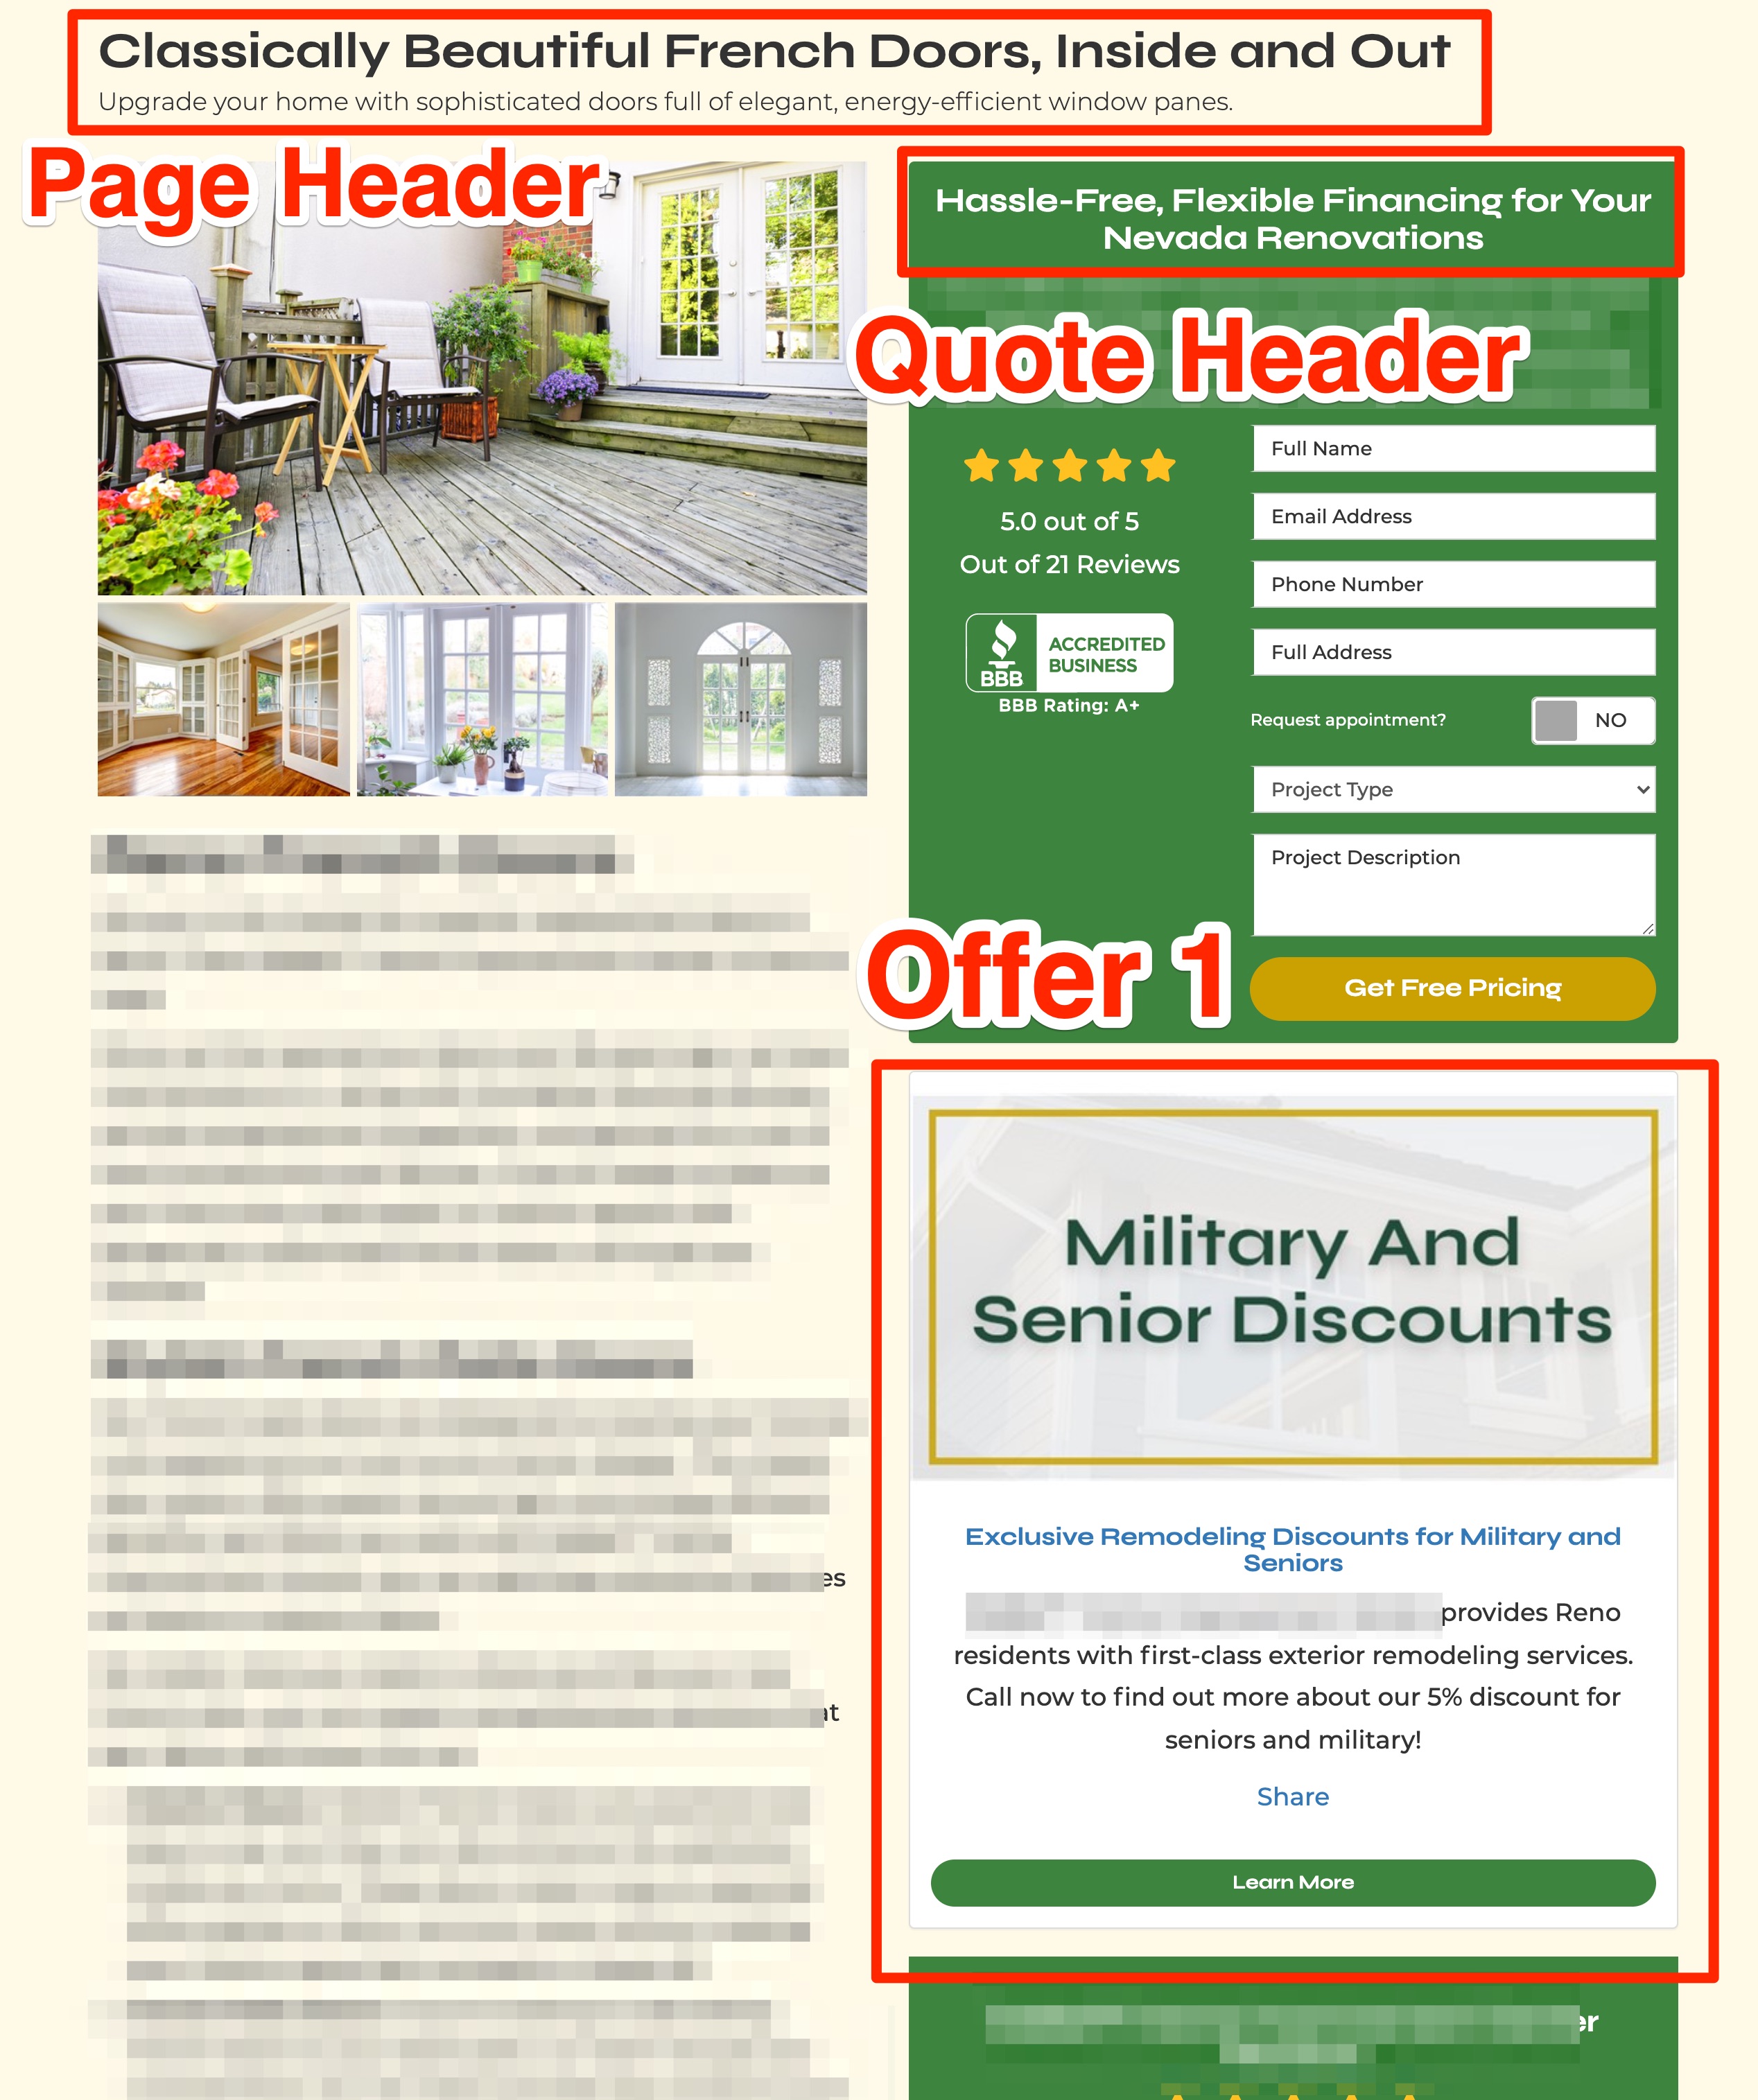
The Offers & Messages section of page info allows you to control the following parts on the page (labeled from the frontend on the screenshot below):
Page Options
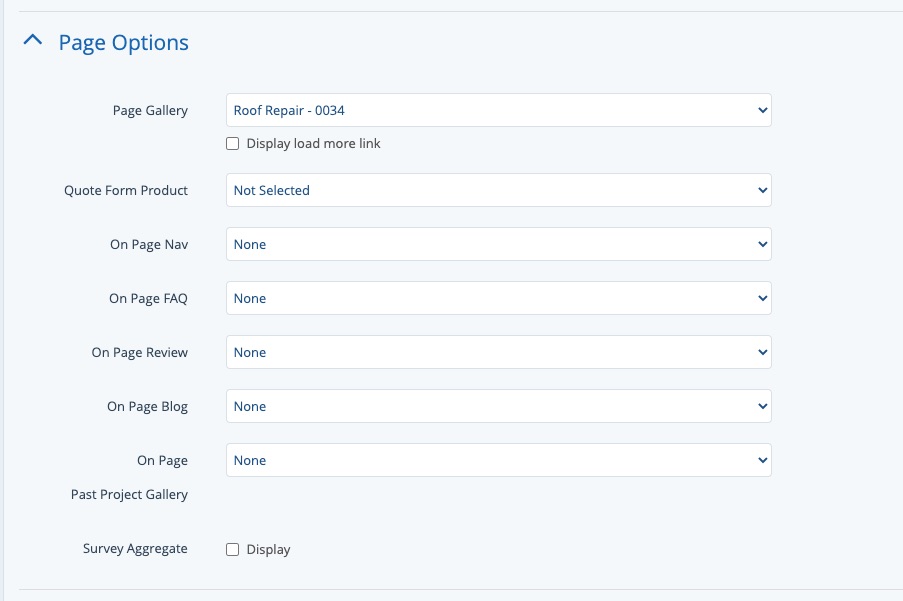
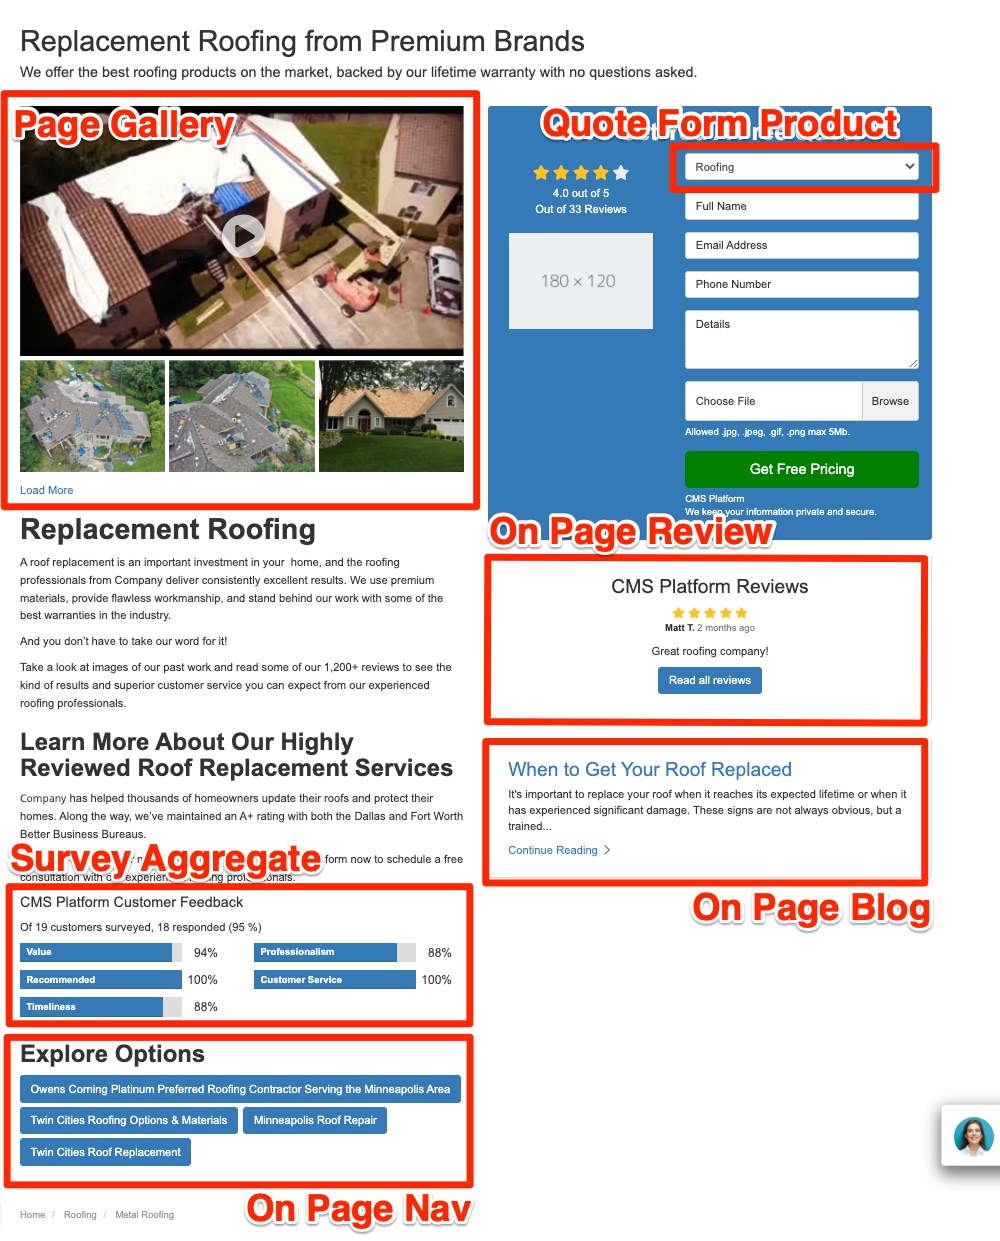
The Page Options section allows you to set additional details for this page, all of which are optional. These settings include the following (with a labeled screenshot below):
Form Result
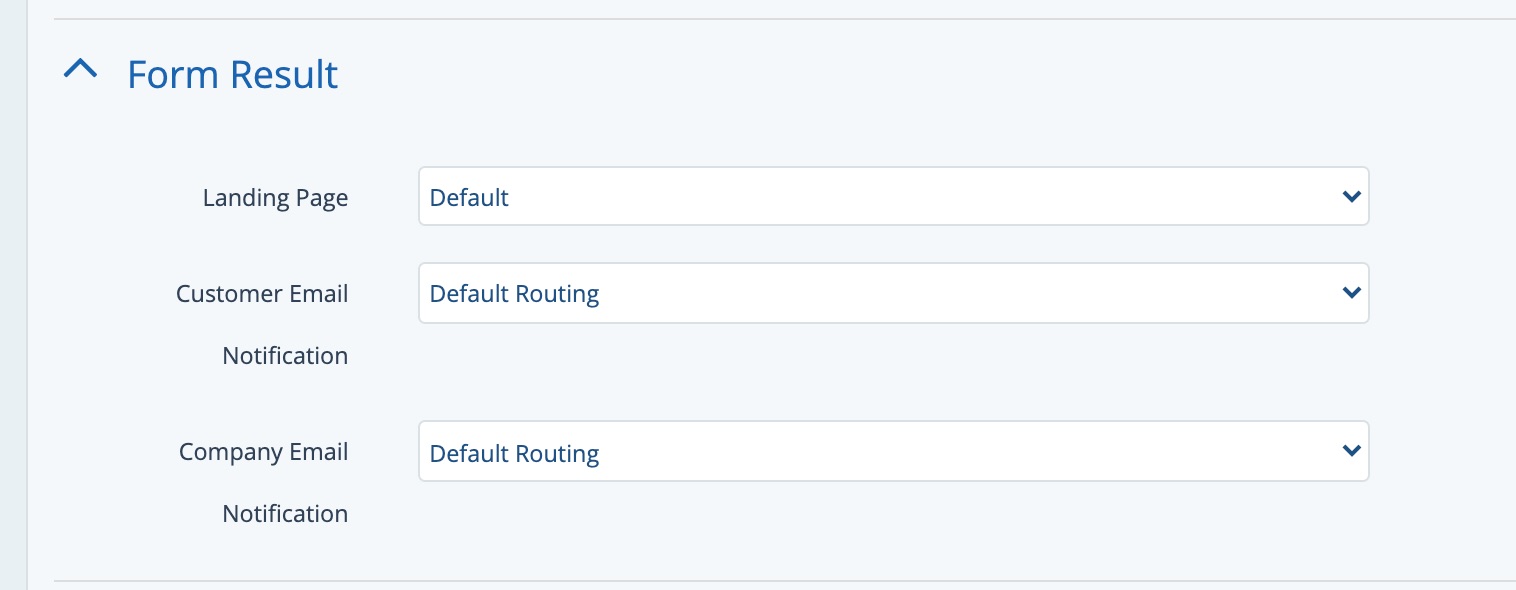
The Form Result section controls what happens after a customer submits the quote form presented on this page, including:
- Page Header: This field allows you to set a custom header for the page, including a large headline and short descriptive text. You can choose none, you can create your own by choosing "Custom," or you can auto-populate any text saved to an offer you've created.
- Quote Header: This field controls the heading at the top of the quote form, which is displayed to the upper right of the page.
- Offer 1: This is an optional element. By selecting an offer here, it will appear as a card just beneath the quote form. Click the Add Offer button to add subsequent offers beneath.
- Page Gallery: Use the dropdown menu to choose any gallery you've set up under Site Content > Media Galleries. The gallery will be displayed at the top of the page, between the header and the main content.
- Quote Form Product: By selecting a product here, the quote form on this page will be pre-populated with that product. However, the customer can still click into the dropdown menu to choose another product if desired.
- Button Text: Enter text to customize the button that appears at the bottom of the quote form. Note that there is a 100 character limit.
- On Page Review: Use the dropdown menu to choose which review to display on the page, if any. Options include no review, the latest review, the latest review for a specific service, or the latest review in a specific market. (Learn more about reviews here.)
- On Page Blog: Use the dropdown menu to choose which blog post to display on the page, if any. Options include no blog post, the latest blog post, or the latest blog post in a specific category.
- On Page Nav: Use the dropdown menu to choose which pages, if any, are linked as buttons under the "Explore Options" headline beneath the main page copy.
- On Page Past Project Gallery: Use the dropdown menu to choose which past project galleries, if any, will display at the bottom of the right-hand column.
- Survey Aggregate: Check this box to display a chart of your survey results on the page. (Learn more about surveys and using survey aggregates.)
- Landing Page: Choose whether you'd like to direct the customer to the default landing page or to a custom landing page from the dropdown menu. (See examples of these thank you pages here.)
- Customer Email Notification: Choose the email notification you'd like to send to this customer automatically. (Note that in the dropdown menu, you will be able to choose any customer email template that is the "quote" type and is set to the "manual" email trigger option.)
- Company Email Notification: Choose the email notification you'd like to send to your team automatically. (Note that in the dropdown menu, you will be able to choose any company email template that is the "quote" type and is set to the "manual" email trigger option.)
For both types of email notification, selecting any notification from the dropdown menu will override the default quote form notification settings. If you would instead like to change the default, you can edit the quote form email template (under Notifications > Email Templates).
Meta Information
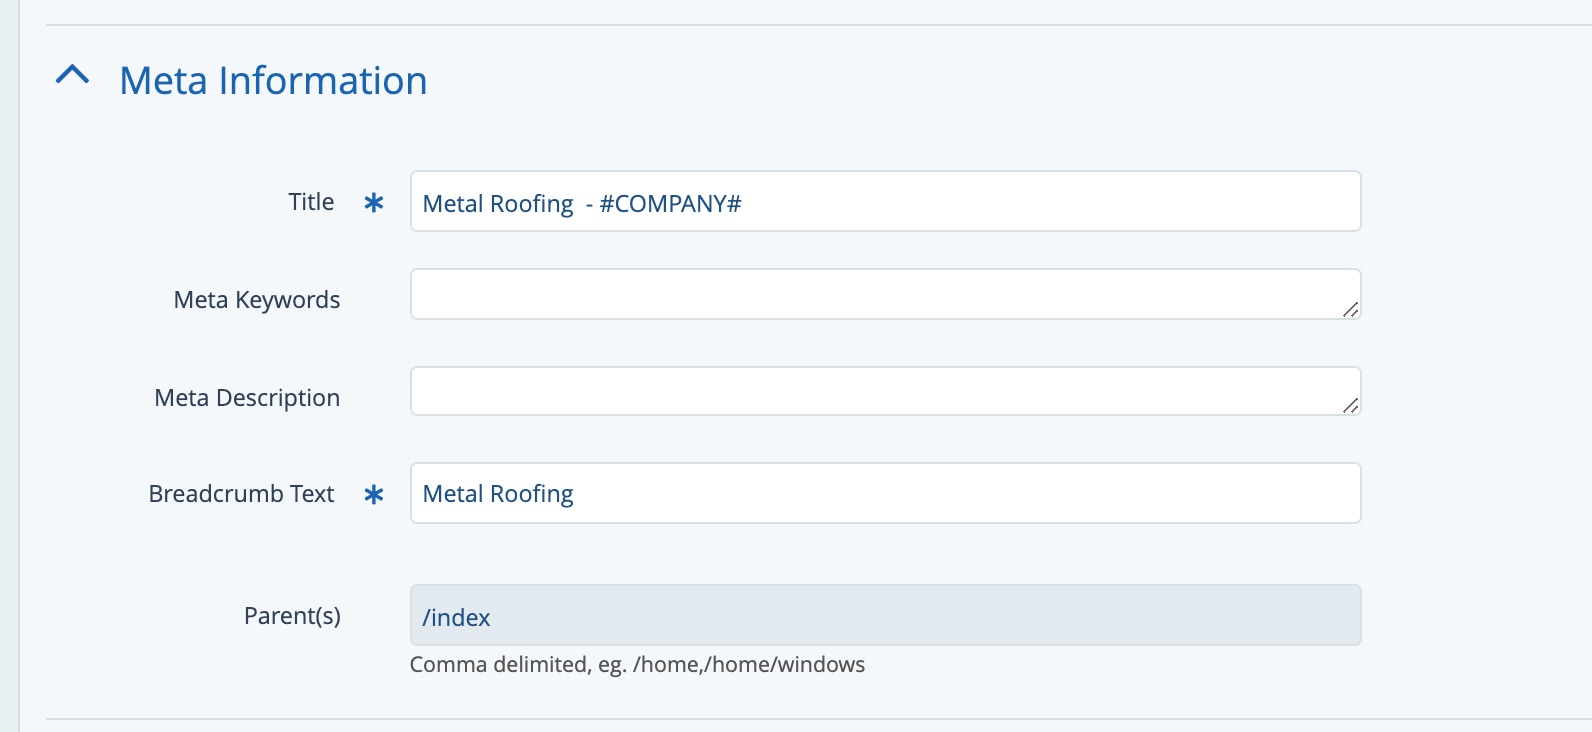
The Meta Information section allows you to control the page's meta information, most of which is not visible to the website visitor but is used by search engines to understand the content of a page (and rank it in search results). These fields include:
- Title: This is the label that appears in the tab of your internet browser for the page.
- Meta Keywords: The keywords you place here will be automatically added to the <head> section of the page's code.
- Meta Description: Meta descriptions are used by search engines and are often displayed under the page link within search results. Meta descriptions will ideally summarize the page, include a keyword, and present an attractive call to action.
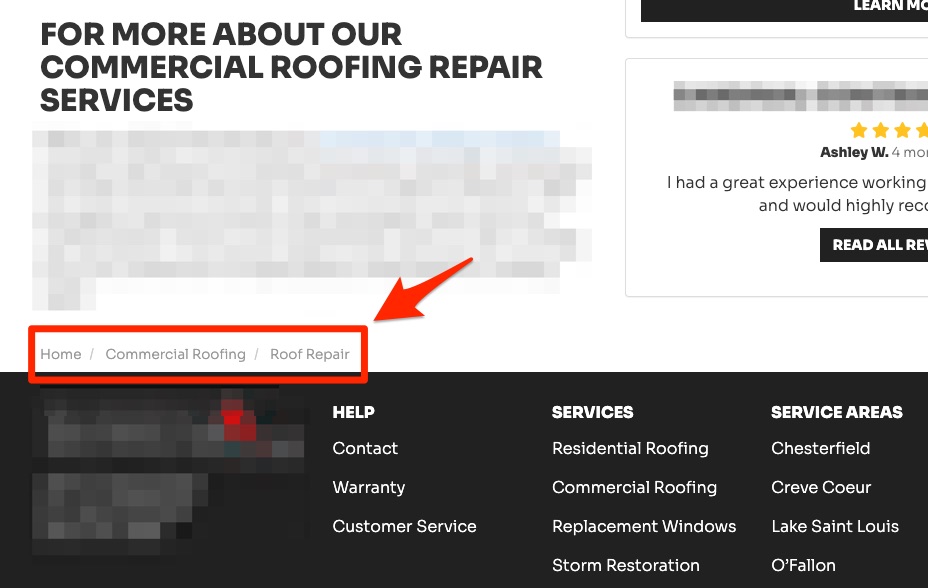
- Breadcrumb Text: This is the only field from this section that is visible from the frontend of your website. It will appear at the bottom of the page (as shown below).
- Parents: Parent pages are automatically determined by the LISA admin and cannot be updated manually.
Disable/Enable Features
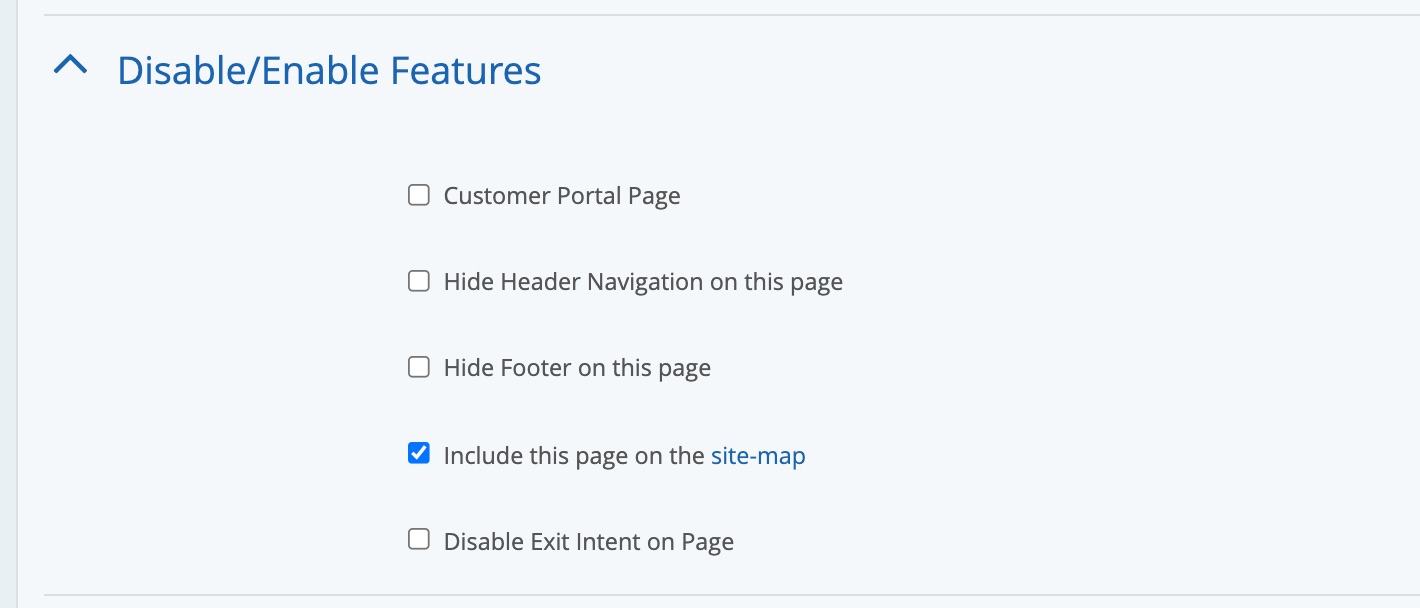
The Disable/Enable Features section provides additional options for this page:
- Customer Portal Page: This box should only be checked on the page with the URL of /customer-portal/.
- Head Header Navigation: Hiding the header navigation will remove the main navigation bar from the page. Your logo, phone number, and call-to-action button will still be displayed.
- Hide Footer: Hiding the footer will remove the footer from this page, which often includes your company name and address as well as links.
- Include This Page on the Site-Map: This option is checked by default, but you can uncheck it to remove it from the site map. (A page not listed on the site map and not included in navigation menus is essentially "hidden" and will only be accessible by direct link.)
- Disable Exit Intent on Page: Check this box to turn off exit intent on this page.
Scripts
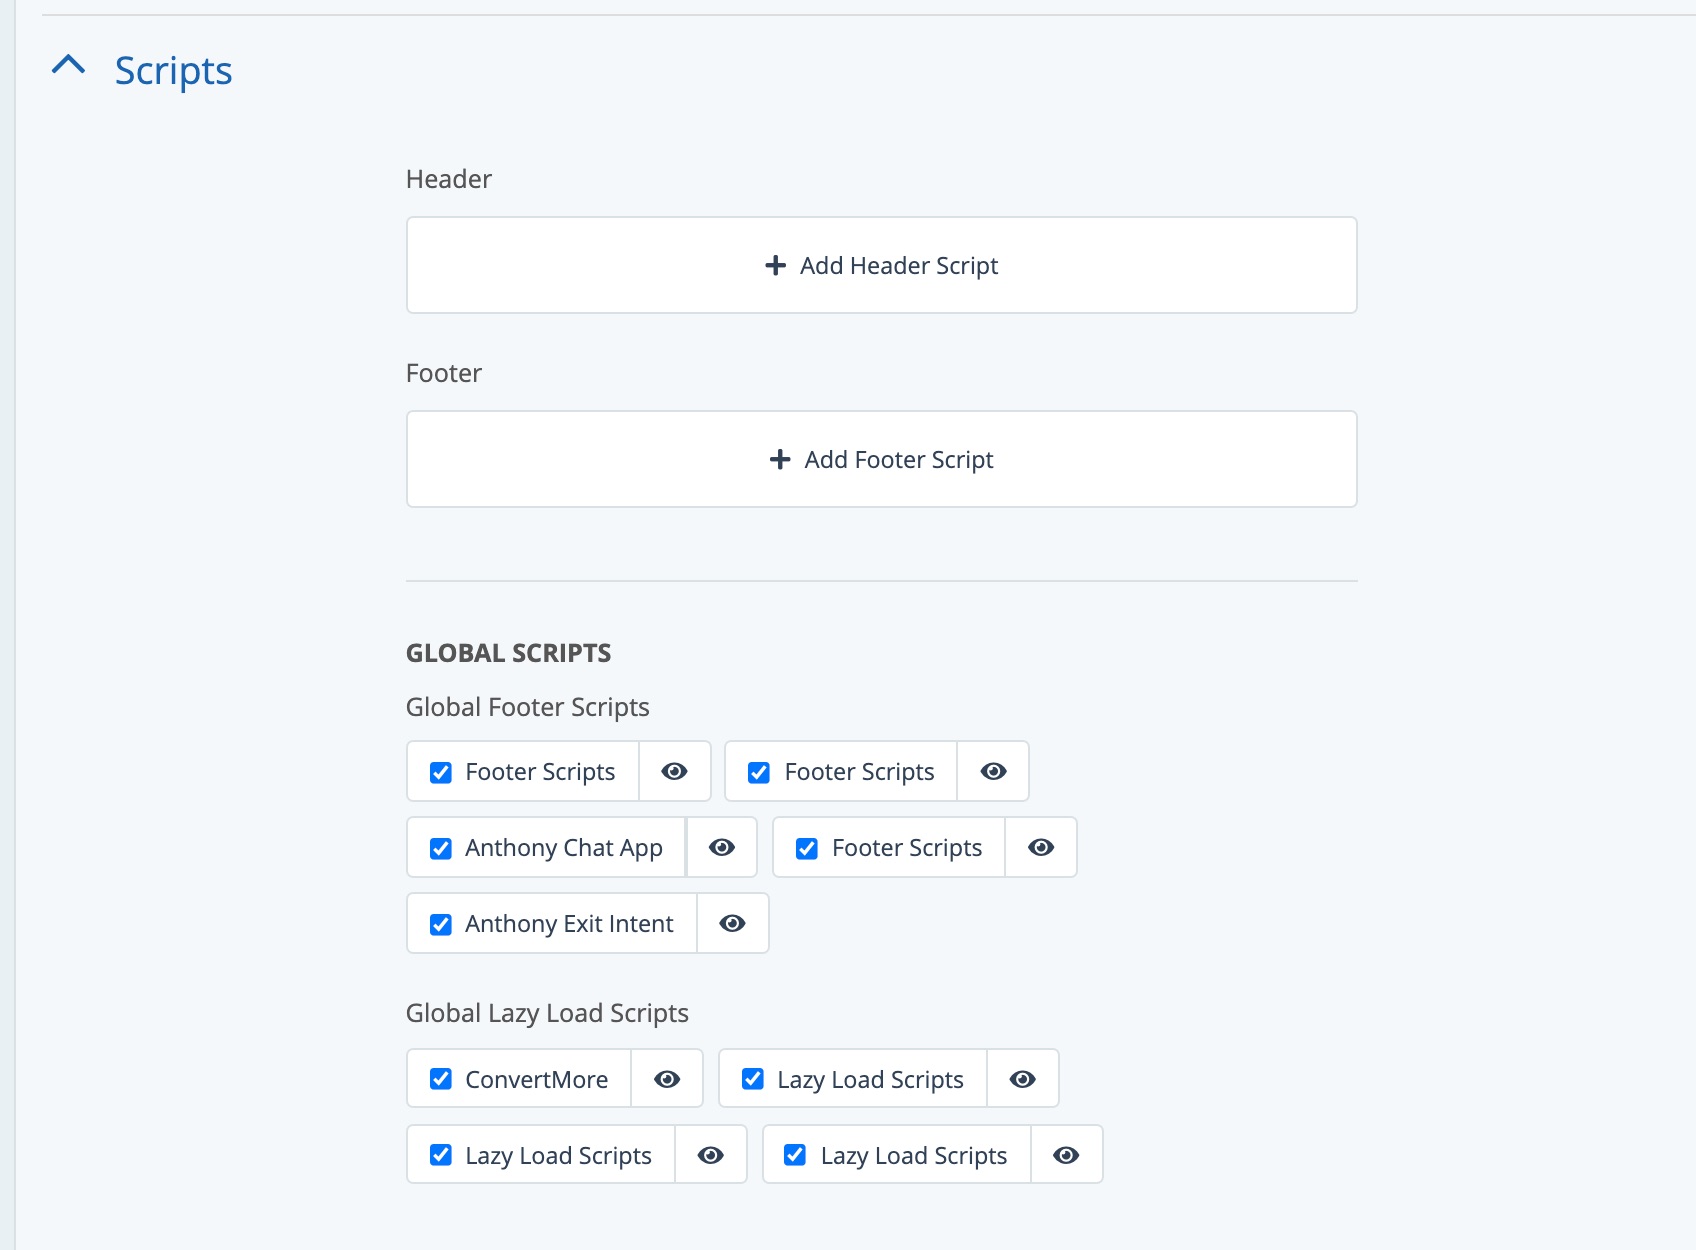
Scripts are used to add additional functionality to a page. Within the scripts section, you'll see that available scripts are divided into two main sections:
- The top half (Header and Footer) are specific to this individual page. Click the button to add a new script.
- The bottom half (Global Scripts) shows all global scripts and allows you to check/uncheck global scripts as needed.
To learn more about scripts and when you might use them, please refer to our overview of scripts. (Link coming soon!)